|

Manchester | Cheshire

Latest News

Manchester’s healthcare landscape has been significantly enhanced with the inauguration of Deansgate Hospital, a state-of-the-art private facility introduced by CLNQ. Strategically located in the heart of Manchester’s Deansgate district, this hospital seamlessly combines advanced medical technology with a patient-centric approach, offering a comprehensive range of services in a luxurious setting. The new Manchester private hospital …

Manchester’s healthcare landscape has been significantly enhanced with the inauguration of Deansgate Hospital, a state-of-the-art private facility introduced by CLNQ. Strategically located in the heart of Manchester’s Deansgate district, this hospital seamlessly combines advanced medical technology with a patient-centric approach, offering a comprehensive range of services in a luxurious setting. The new Manchester private hospital is located within walking distance from the flagship CLNQ clinic in New Jackson’s Deansgate Square.

A Vision Realised: The Genesis of Deansgate Hospital

The establishment of Deansgate Hospital stems from CLNQ’s commitment to redefining private healthcare. Under the leadership of renowned consultant plastic surgeon Mr. Reza Nassab, the hospital aims to provide unparalleled medical, surgical, and wellness services. The facility is designed to cater to the diverse needs of patients, ensuring personalised care and exceptional outcomes.

State-of-the-Art Facilities and Services

Deansgate Hospital boasts two advanced operating theatres equipped for both general anaesthesia and local anaesthetic procedures, alongside a minor operations suite and well-appointed consultation rooms. This infrastructure supports a wide array of services, including:

  • Plastic and Cosmetic Surgery: Procedures such as breast augmentation, facelifts, liposuction, and the innovative Motiva Preservé technique are performed by experienced surgeons, ensuring natural-looking results.
  • Surgical Specialties: The hospital will provide a wide range of surgical specialties such as Hand Surgery, Eye Surgery, Orthopaedics, Urology and Gynaecology.
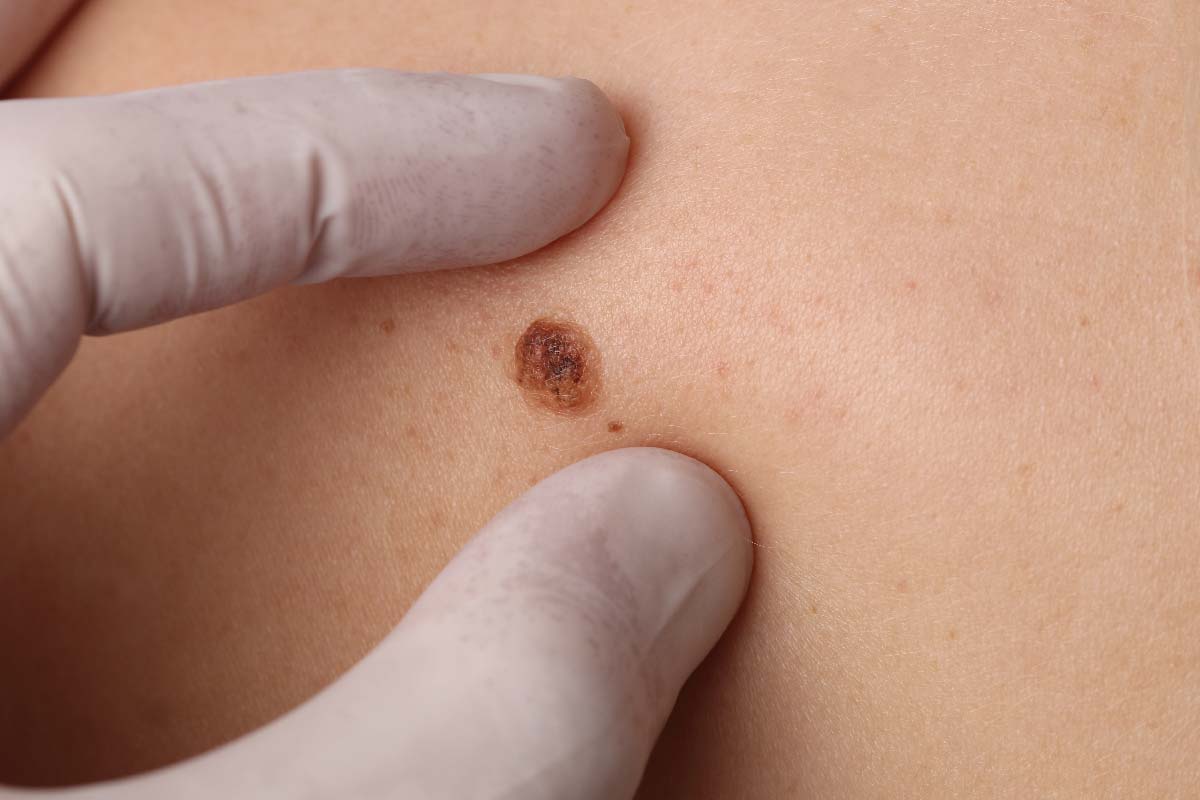
  • Private GP and Health Screening: Comprehensive health assessments, genetic screening, and personalised medical consultations are offered to address various health concerns.

The hospital’s commitment to integrating advanced technology with patient comfort ensures a holistic healthcare experience.

Strategic Location and Accessibility

Situated in the Deansgate area, Deansgate Hospital is easily accessible via public transport, with proximity to bus, tram, and train services. This central location not only provides convenience for local residents but also attracts patients from across the UK and abroad seeking high-quality private healthcare. The surrounding area offers a plethora of amenities, including restaurants, shops, and accommodation options, making it convenient for patients and their families.

Introducing Motiva Preservé: A Revolutionary Approach to Breast Augmentation

Deansgate Hospital is proud to be among the first facilities in the UK to offer the Motiva Preservé technique—a groundbreaking advancement in breast augmentation. Developed by Establishment Labs, Motiva Preservé represents a shift towards minimally invasive procedures that prioritise tissue preservation and natural aesthetics.

What is Motiva Preservé?

Motiva Preservé is an innovative breast augmentation method that combines advanced implant technology with refined surgical techniques. Unlike traditional breast augmentation, which often involves significant tissue manipulation, Motiva Preservé focuses on preserving the patient’s native breast tissues, leading to:

  • Minimally Invasive Procedure: Smaller incisions result in reduced scarring and quicker recovery times.
  • Natural Look and Feel: The SmoothSilk® Ergonomix2® implants used in this technique mimic the movement and softness of natural breast tissue.
  • Enhanced Stability: The preservation of native tissues provides better support for the implant, reducing the risk of complications such as implant malposition.

This technique is particularly suitable for patients seeking a more natural enhancement with minimal downtime. The procedure is typically performed under local anaesthesia with sedation, allowing patients to remain awake and comfortable throughout.

Benefits of Motiva Preservé

  • Reduced Recovery Time: Patients often experience less postoperative discomfort and can return to their daily activities sooner compared to traditional methods.
  • Lower Risk of Complications: The minimally invasive nature of the procedure reduces the likelihood of issues such as capsular contracture and implant displacement.
  • Personalised Approach: Each procedure is tailored to the individual’s anatomy and aesthetic goals, ensuring optimal results.

By offering Motiva Preservé, Deansgate Hospital reinforces its commitment to providing cutting-edge treatments that align with the evolving preferences of patients seeking subtle and natural enhancements.

A Holistic Approach to Patient Care

Beyond surgical excellence, Deansgate Hospital emphasises a holistic approach to patient care. From the initial consultation to postoperative follow-ups, patients receive comprehensive support tailored to their unique needs. The hospital’s multidisciplinary team collaborates to ensure that every aspect of the patient’s journey is seamless and comfortable.

Private GP and Health Screening

Deansgate Hospital’s private GP services provide patients with prompt access to medical consultations, health screenings, and diagnostic tests. This proactive approach enables early detection and management of potential health issues, aligning with the hospital’s preventive care philosophy.

Commitment to Excellence and Safety

Deansgate Hospital operates under stringent safety protocols and is registered with the Care Quality Commission (CQC), ensuring adherence to the highest standards of clinical governance. The hospital’s infrastructure is designed to facilitate rapid recovery, with private bays equipped with modern amenities to enhance patient comfort.

The surgical team, led by Mr. Reza Nassab, comprises highly qualified specialists with extensive experience in their respective fields. Their dedication to continuous professional development ensures that patients benefit from the latest advancements in medical science.

Conclusion

The opening of Deansgate Hospital marks a significant milestone in Manchester’s private healthcare sector. By integrating advanced medical technologies with a patient-focused approach, the hospital sets a new standard for excellence in care. The introduction of innovative procedures like Motiva Preservé further exemplifies its commitment to offering cutting-edge treatments that meet the evolving needs of patients.

Whether seeking cosmetic enhancements, wellness therapies, or comprehensive medical care, patients can trust Deansgate Hospital to provide personalised services in a luxurious and supportive environment. As the hospital continues to grow and expand its offerings, it stands poised to become a leading destination for private healthcare in the UK.

For more information or to schedule a consultation, please visit Deansgate Hospital’s official website.


Vitamin D deficiency is a widespread concern that often goes unnoticed because its symptoms can be subtle or mistaken for other health issues. In the UK, our weather and limited sunshine—especially during late autumn and winter—can increase the likelihood of having low vitamin D levels. Research suggests that a significant portion of the population may …

Vitamin D deficiency is a widespread concern that often goes unnoticed because its symptoms can be subtle or mistaken for other health issues. In the UK, our weather and limited sunshine—especially during late autumn and winter—can increase the likelihood of having low vitamin D levels. Research suggests that a significant portion of the population may have insufficient levels of this crucial nutrient without even realising it.

We will cover what vitamin D is, the reasons behind its deficiency, common risk factors, the consequences of long-term low levels, and how to prevent and treat this deficiency effectively. By understanding the signs to look out for, you can take proactive steps to keep your body and mind in optimum health.

What Is Vitamin D?

Vitamin D is a fat-soluble vitamin that plays a fundamental role in numerous bodily processes. It stands out among vitamins because it can be synthesised by the human body when the skin is exposed to sunlight, specifically ultraviolet B (UVB) radiation. Despite this natural mechanism, many people do not get enough vitamin D.

Key Functions of Vitamin D

  1. Bone Health: Vitamin D is vital for calcium absorption in the gut. Without sufficient vitamin D, calcium from your diet may not be adequately absorbed, which can lead to weaker bones and an increased risk of fractures.
  2. Immune Function: Vitamin D supports the immune system by regulating immune responses and reducing inflammation. Low levels of vitamin D have been linked to an increased susceptibility to infections, including respiratory illnesses.
  3. Muscle Function: Adequate vitamin D helps maintain healthy muscle mass and strength. Deficiency can contribute to weakness, making even routine activities more challenging.
  4. Mood Regulation: Some research suggests that vitamin D may play a role in mental health, including mood and cognitive function. Deficiency has been associated with an increased risk of mood disorders, though further studies are required to understand the exact mechanisms involved.

How the Body Produces and Uses Vitamin D

When you are exposed to sunlight, the UVB rays interact with a cholesterol derivative in your skin, converting it into vitamin D3 (cholecalciferol). This form of vitamin D is then transported to the liver, where it is converted into 25-hydroxyvitamin D, or calcidiol. Finally, calcidiol travels to the kidneys and is converted into 1,25-dihydroxyvitamin D, also known as calcitriol—the biologically active form of vitamin D.

Factors Affecting Production

  1. Geographical Location: People living farther from the equator generally have fewer months with strong enough UVB rays to support adequate vitamin D production. In countries like the UK, from about October to early March, the sun’s angle is too low for your skin to synthesise enough vitamin D.
  2. Skin Pigmentation: Individuals with darker skin have more melanin, which can reduce the skin’s ability to produce vitamin D from sunlight. This often places them at higher risk of deficiency, especially if living in areas with limited sunlight.
  3. Age: As people grow older, the skin becomes less efficient at producing vitamin D. This is why older adults are frequently advised to consider vitamin D supplements.
  4. Sun Protection: While sunscreen is important to reduce the risk of skin cancer, high SPF products significantly block UVB rays, thus decreasing vitamin D production.
  5. Lifestyle: People who spend most of their time indoors or wear clothing that covers most of their skin when outdoors may not get enough sunlight to produce an adequate amount of vitamin D.

Common Causes of Vitamin D Deficiency

  1. Lack of Sunlight: Living in regions with less sunlight exposure, having limited time outdoors, or always covering up with clothing or sunscreen can all reduce vitamin D synthesis.
  2. Dietary Insufficiency: Though certain foods like oily fish (salmon, mackerel, sardines), egg yolks, and fortified products contain vitamin D, it can be challenging to get enough through diet alone, especially if you follow a vegan or vegetarian diet that excludes key animal-based sources.
  3. Malabsorption Issues: Conditions like coeliac disease, Crohn’s disease, or cystic fibrosis can interfere with the body’s ability to absorb nutrients, including vitamin D. Weight-loss surgeries that bypass parts of the intestine can also reduce vitamin D absorption.
  4. Obesity: Vitamin D is stored in body fat. In individuals with higher amounts of body fat, vitamin D can become “trapped” within adipose tissue, lowering its availability in the bloodstream.
  5. Kidney or Liver Disorders: Since these organs are essential to converting vitamin D into its active form, any impairment can contribute to deficiency.
  6. Chronic Health Conditions: Certain chronic illnesses, as well as medications such as anticonvulsants or corticosteroids, may disrupt the metabolism of vitamin D.

Vitamin D Deficiency Symptoms

Vitamin D deficiency often goes unnoticed because the symptoms can be subtle, develop over time, and mimic those of other health conditions. Below are some common signs and symptoms that may indicate a deficiency. However, experiencing one or more of these symptoms does not automatically mean you are deficient in vitamin D; professional medical advice and blood testing are crucial for a correct diagnosis.

Fatigue and Low Energy

Persistent tiredness is a common complaint. Low vitamin D levels can contribute to a sense of chronic fatigue, even if you are getting enough sleep. This may be due to vitamin D’s role in energy metabolism and muscle function.

Bone and Joint Pain

When vitamin D is low, calcium absorption suffers. As a result, your bones may not get the mineral support they need, leading to aches and pains, particularly in areas like the lower back, hips, or legs. Over time, this can progress to more serious issues like osteomalacia (softening of the bones).

Muscle Weakness and Cramps

Insufficient vitamin D can interfere with the proper functioning of muscles, causing weakness or cramps. This is especially notable in older adults, who may find it more challenging to carry out day-to-day tasks and are more susceptible to falls.

Frequent Illnesses and Reduced Immunity

Vitamin D helps regulate the immune system, and low levels may leave you more vulnerable to illnesses, including common colds, flu, and other infections. Some research also suggests a relationship between low vitamin D and increased risk of autoimmune conditions.

Mood Changes and Depression

Research has shown an association between low vitamin D levels and mood disorders, including depression. While the exact mechanism is still under investigation, vitamin D receptors in the brain may play a role in regulating mood and cognitive functions.

Slow Wound Healing

Vitamin D plays a role in cell growth and inflammation control. Deficiency might manifest as slower-than-normal healing of cuts or scrapes. If you notice wounds or surgical incisions taking unusually long to heal, low vitamin D levels could be part of the cause.

Hair Loss

Severe hair loss has been linked with various nutritional deficiencies, including vitamin D deficiency. While hair loss can be influenced by genetics, stress, or other factors, it may be worth checking your vitamin D status if you’ve noticed more shedding than usual.

Osteoporosis and Fracture Risk

Over the long term, insufficient vitamin D can contribute to osteoporosis, a condition characterised by reduced bone density. This significantly raises the risk of fractures. The synergy between vitamin D and calcium is crucial for bone mineralisation, so chronic deficiency compromises bone strength.

Risk Groups and Factors

While vitamin D deficiency can affect anyone, certain groups are at higher risk:

  1. Older Adults: Reduced skin production and potential lack of outdoor activity make this group particularly vulnerable.
  2. Darker-Skinned Individuals: Higher melanin levels decrease the efficiency of vitamin D synthesis from sunlight.
  3. People Who Cover Their Skin: Whether for cultural or personal reasons, covering most of the skin outdoors can reduce UVB exposure.
  4. Individuals with Limited Outdoor Time: Office workers, shift workers, or those confined indoors due to health or mobility issues may not get enough sun exposure.
  5. Babies and Young Children: Rapid growth demands adequate vitamin D for bone development. Breastfed babies might need supplementation if the mother’s vitamin D levels are low.
  6. Pregnant and Breastfeeding Women: Nutritional demands increase during these periods, so ensuring adequate levels is crucial for both mother and baby.
  7. People with Obesity: Excess adipose tissue can “sequester” vitamin D, making it less available to the body.
  8. Certain Medical Conditions: Chronic illnesses involving the liver, kidneys, or gut can interfere with vitamin D metabolism.

Health Implications of Long-Term Deficiency

Prolonged vitamin D deficiency can lead to serious health problems, such as:

  • Osteomalacia in Adults: This refers to the softening of the bones, leading to bone pain and muscle weakness.
  • Rickets in Children: A condition characterised by poor bone development, resulting in bone deformities such as bowed legs.
  • Increased Risk of Osteoporosis: Over time, low vitamin D can escalate bone density loss, leading to fragile bones and an elevated fracture risk.
  • Higher Susceptibility to Certain Diseases: Some studies point to associations between inadequate vitamin D levels and conditions like heart disease, diabetes, and certain autoimmune disorders. However, more research is required for definitive conclusions.

Diagnosing Vitamin D Deficiency

The most reliable way to diagnose vitamin D deficiency is through a blood test measuring the level of 25-hydroxyvitamin D (25(OH)D). In the UK, the following reference ranges are often used:

  • Deficiency: < 25 nmol/L
  • Insufficiency: 25–50 nmol/L
  • Sufficient: > 50 nmol/L

Who Should Get Tested?

  1. Individuals who exhibit multiple symptoms of deficiency (e.g., bone pain, muscle weakness).
  2. People in high-risk groups, such as those with certain medical conditions, dark skin, or limited sunlight exposure.
  3. Older adults, especially those prone to falls or fractures.
  4. Patients with malabsorption syndromes or chronic diseases affecting the kidneys or liver.

At CLNQ, we provide blood tests for assessment of general health and vitamin D deficiency.

Treatment and Prevention

Treating and preventing vitamin D deficiency typically involves a combination of sensible sun exposure, dietary measures, and supplementation. The method and dosage depend on individual factors such as age, skin type, lifestyle, and existing health conditions.

Sunlight Exposure

Moderate outdoor time is crucial. In warmer months, short daily intervals (e.g., 10–15 minutes) of sun exposure on uncovered skin (like the forearms, hands, or lower legs) can help maintain adequate vitamin D levels. This timeframe may need adjustment based on skin tone and sensitivity to sunburn. Always balance the need for vitamin D with the risk of skin damage. Overexposure increases the risk of skin cancer, so avoid prolonged periods in direct sunlight, especially during peak hours.

Dietary Sources of Vitamin D

While it is challenging to get all of your vitamin D from diet alone, incorporating vitamin D-rich foods can be beneficial:

  • Oily Fish (salmon, mackerel, trout, sardines): One of the richest natural sources of vitamin D.
  • Egg Yolks: Opt for eggs from hens that are fed a vitamin D-enriched diet for slightly higher levels.
  • Fortified Foods: Some cereals, plant-based milk alternatives (e.g., soy, almond), and dairy products are fortified with vitamin D.
  • Mushrooms: Certain varieties, particularly those exposed to UV light, can provide a moderate amount of vitamin D2.

Supplements

For many individuals, especially during winter months in the UK, supplements are a practical solution for maintaining adequate vitamin D levels. Available forms include vitamin D3 (cholecalciferol) and vitamin D2 (ergocalciferol). Vitamin D3 is generally more effective at raising and sustaining blood levels of vitamin D.

  • Daily Dosage: Public Health England recommends a daily supplement containing 10 micrograms (400 IU) of vitamin D, particularly during the autumn and winter months. However, dosages may vary if you have a diagnosed deficiency.
  • High-Dose Supplements: In cases of severe deficiency, doctors may prescribe higher doses. It is essential to follow medical advice, as too much vitamin D can lead to toxicity, albeit rarely.
  • Vitamin D injections: Vitamin D can also be administered by shots or injections. At CLNQ, we offer vitamin D shots to help with low vitamin D levels.

Lifestyle Measures to Support Vitamin D Levels

Beyond supplementation and diet, several lifestyle measures can support healthy vitamin D levels:

  1. Balanced Nutrition: Combine protein, healthy fats, and vitamins/minerals to maximise the overall absorption of nutrients, including vitamin D and calcium.
  2. Regular Exercise: Weight-bearing exercises like walking or resistance training can enhance bone health.
  3. Maintain a Healthy Body Weight: Excess body fat can trap vitamin D; maintaining a healthy weight can improve its availability in your system.
  4. Manage Chronic Conditions: If you have a condition that affects nutrient absorption or vitamin D metabolism, regular check-ups and proactive management can help.
  5. Mind Your Alcohol Intake: Chronic heavy drinking can interfere with vitamin D metabolism and bone health.

Practical Tips for Maintaining Optimal Vitamin D

  • Track Sun Exposure: A simple diary or smartphone app can help you keep track of how often you get outside during daylight hours.
  • Pair with Calcium: Consuming adequate calcium (from dairy products, leafy greens, or fortified alternatives) supports the work of vitamin D in bone health.
  • Check Labels: When purchasing milk alternatives or cereals, look for products fortified with vitamin D to boost your dietary intake.
  • Consider Age-Specific Needs: Children, older adults, and pregnant women all have distinct requirements for vitamin D. Consult a doctor for personalised guidance.
  • Book a Consultation at CLNQ: Our team is available to help advise you about measuring and treating Vitamin D deficiency.

Frequently Asked Questions (FAQs)

Can I get vitamin D through windows?

Most windows block UVB rays, which are essential for vitamin D production. So, sitting by a sunny window is unlikely to help your body synthesise vitamin D.

Can vitamin D supplements cause toxicity?

Vitamin D toxicity (hypervitaminosis D) is rare and generally occurs from excessive high-dose supplementation, not from sun exposure or a normal diet. However, it is essential to follow recommended dosages. Too much vitamin D can lead to elevated calcium levels, which may cause issues like nausea, vomiting, and kidney problems.

How long does it take to correct vitamin D deficiency?

This depends on the severity of the deficiency and the dosage of supplementation. With an appropriate dose, blood levels can improve significantly within a few weeks to a couple of months. Your doctor may re-test your levels during or after treatment to confirm improvement.

Is there a difference between vitamin D2 and D3?

Yes, vitamin D3 (cholecalciferol) is generally considered more effective in raising and maintaining serum 25-hydroxyvitamin D levels than vitamin D2 (ergocalciferol). Vitamin D3 is typically derived from animal-based sources, while vitamin D2 comes from plant sources.

Can foods alone correct a vitamin D deficiency?

While consuming vitamin D-rich foods is beneficial, many individuals find it challenging to meet their needs through diet alone, particularly if they have limited sun exposure. In such cases, supplements are often recommended.

Conclusion

Vitamin D deficiency is a common but often overlooked health issue that can have wide-ranging consequences, from fatigue and muscle weakness to more serious bone-related conditions like osteoporosis. In the UK, limited sunlight—especially in the cooler months—makes it challenging to maintain optimal vitamin D levels solely through sun exposure.

By recognising the common symptoms—such as persistent tiredness, bone and joint pain, lowered immunity, and mood changes—you can address a potential deficiency early. Risk factors include living in regions with limited sunlight, having darker skin, obesity, certain medical conditions, and following diets low in vitamin D-rich foods.

A definitive diagnosis is best achieved through a blood test measuring 25-hydroxyvitamin D. Treatment strategies typically encompass targeted sunlight exposure, dietary adjustments, vitamin D injections and supplements. Lifestyle measures such as regular exercise, maintaining a healthy weight, and balancing your overall nutrient intake also support healthier vitamin D levels.

Taking proactive steps—like scheduling regular check-ups, being mindful of sun exposure, and considering supplements—can significantly improve both short-term and long-term health outcomes. Whether you are an older adult, have darker skin, or simply lack the sunlight needed during a British winter, awareness and early intervention remain key to preventing complications arising from vitamin D deficiency.

Raised skin bumps are incredibly common and can appear anywhere on the body, from the face and neck to the trunk and limbs. They vary greatly in size, appearance, and underlying cause. While many lumps or bumps on the skin are harmless, others can signal more serious health concerns that may require prompt medical attention. …

Raised skin bumps are incredibly common and can appear anywhere on the body, from the face and neck to the trunk and limbs. They vary greatly in size, appearance, and underlying cause. While many lumps or bumps on the skin are harmless, others can signal more serious health concerns that may require prompt medical attention. Knowing how to recognise different types of bumps and what they may indicate can help you stay informed about your skin health.

We will explore a wide range of raised skin bumps, from common benign lesions such as sebaceous cysts to potentially more concerning lumps such as skin cancers. The aim is to provide you with detailed information in clear, straightforward language, so you feel more confident identifying the bumps on your skin and deciding what steps to take next. You should always consult a skin specialist or GP if you have any concerns about any skin lesions.

What Are Raised Skin Bumps?

Raised skin bumps are protrusions, lumps, or swelling on the surface of the skin. They can appear in various shapes, colours, and textures. Some bumps are soft and movable under the skin, while others feel firm or even hard to the touch. They can be painless, itchy, or occasionally tender or painful.

Many people experience at least one type of raised skin bump at some point in their lives. Common reasons for their appearance include:

  • Blocked pores or glands (e.g., sebaceous cysts)
  • Overgrowth of skin tissue (e.g., dermatofibromas, keloids)
  • Skin infections (e.g., boils, warts)
  • Allergic reactions or inflammation
  • Lipomas (benign tumours of fatty tissue)
  • Skin cancers (e.g., basal cell carcinoma, melanoma)

Common Causes of Raised Skin Bumps

The term “raised skin bumps” is broad, many different conditions or factors can cause them. Some of the most common include:

  1. Sebaceous Cysts (Epidermoid Cysts) These are benign cysts that typically form when hair follicles or oil glands (sebaceous glands) become blocked. They appear as round or oval lumps beneath the skin, often with a central punctum (a small opening). Sebaceous cysts can remain stable in size or gradually enlarge. If they become infected, they may turn red, swell, or become painful.
  2. Lipomas Lipomas are soft, fatty lumps that often develop between the skin and the muscle layer beneath. They grow slowly and are generally painless, although they can occasionally become uncomfortable if they press on surrounding nerves or tissues.
  3. Dermatofibromas Dermatofibromas are small, firm bumps that typically appear on the legs or arms. They are thought to develop in response to minor trauma or insect bites. They tend to be harmless, but some people choose to have them removed if they are painful or cosmetically unappealing.
  4. Keratosis Pilaris Also known as “chicken skin,” keratosis pilaris causes small, rough bumps on the skin, especially on the upper arms, thighs, buttocks, or cheeks. It arises when keratin—a protein found in skin—builds up and plugs hair follicles. Although harmless, some find it bothersome from a cosmetic perspective.
  5. Boils and Abscesses A boil, or furuncle, is typically a red, swollen, painful bump that often develops because of a bacterial infection (commonly Staphylococcus aureus) in a hair follicle or oil gland. When multiple boils cluster together, this is known as a carbuncle. If the infection becomes severe, an abscess may form, which is a collection of pus that needs draining.
  6. Warts Caused by the human papillomavirus (HPV), warts are rough, grainy skin growths that can appear anywhere on the body but are especially common on hands, feet, and the genital area (though genital warts are a separate subtype of HPV). They are contagious and can spread through direct or indirect contact.
  7. Skin Tags These small, soft, flesh-coloured growths often form where the skin folds or rubs together, such as the neck, armpits, and groin. Skin tags are harmless but can be easily removed if they catch on clothing or cause discomfort.
  8. Insect Bites Mosquitoes, bed bugs, fleas, and other insects can leave itchy, raised lumps on the skin. These bumps typically subside over a few days, although some people may experience more pronounced swelling due to allergies.
  9. Allergic Reactions (Hives) Hives, or urticaria, are itchy welts that can appear in response to allergens, stress, temperature changes, or infections. They can vary in size and location and sometimes merge to form larger areas of swelling.
  10. Skin Cancers Although most raised bumps are benign, certain types of skin cancer, such as basal cell carcinoma, squamous cell carcinoma, and melanoma, can present as raised lesions. Changes in shape, size, or colour, or any bleeding or crusting, should be taken seriously.

Identifying the Characteristics of Raised Skin Bumps

Accurate identification of a raised bump can be challenging, as multiple conditions may share similar traits. However, paying attention to a few distinguishing characteristics can help guide you:

  • Texture: Is the bump soft and spongy (e.g., lipoma) or firm (e.g., dermatofibroma)?
  • Mobility: Does the lump move when you press it? Sebaceous cysts can sometimes shift under your fingertips, whereas others are fixed.
  • Colour: Raised bumps may be flesh-coloured, red, brown, or even black in some cases (like certain moles or pigmented basal cell carcinomas).
  • Size: Small bumps like skin tags or dermatofibromas are usually a few millimetres, while lipomas and cysts can be larger.
  • Symptoms: Pain, tenderness, itchiness, or discharge (from boils or infected cysts) can help pinpoint the cause.
  • Location: Certain bumps appear in specific body areas. For instance, keratosis pilaris commonly affects the upper arms, thighs, or cheeks.

Whenever you notice a new bump or changes in an existing one, consider keeping track of these characteristics. If you have concerns, you can discuss your observations with a GP, plastic surgeon, dermatologist, or other skin specialist.

Common Benign Raised Bumps

Many raised skin bumps are benign, meaning they pose no immediate health risk. While benign lumps can sometimes cause discomfort, particularly if they grow large or become irritated, treatment is often optional. Below, we explore some of the most common benign bumps in more detail.

Sebaceous (Epidermoid) Cysts

  • Appearance: Round lump with a visible central “punctum”.
  • Cause: Blocked oil glands or hair follicles.
  • Treatment: May require excision if infected or causing discomfort; smaller cysts might be monitored.

Lipomas

  • Appearance: Soft, doughy, and moveable under the skin.
  • Cause: Overgrowth of fatty tissue, often with a genetic component.
  • Treatment: Removal by surgical excision or liposuction if bothersome or large.

Dermatofibromas

  • Appearance: Firm, small, sometimes pigmented bumps. Can dimple inwards when pinched.
  • Cause: Reaction to minor skin trauma (e.g., insect bite).
  • Treatment: Typically require no treatment unless they cause pain, itching, or cosmetic concerns.

Skin Tags

  • Appearance: Small, soft, skin-coloured growths that hang off the skin.
  • Cause: Friction in skin folds, hormonal changes.
  • Treatment: Snipping, cryotherapy, or cauterisation if removal is desired.

Keratosis Pilaris

Keratosis pilaris is another benign skin condition that can cause numerous tiny, rough bumps on the surface of the skin. Although harmless, it can occasionally be mistaken for other issues:

  • How It Forms: Excess keratin in the skin blocks hair follicles, resulting in a bump or “plug.”
  • Common Sites: Upper arms, thighs, buttocks, and cheeks.
  • Appearance: Skin can feel rough, similar to sandpaper. Sometimes redness or irritation occurs.
  • Management:
    • Regularly exfoliating with gentle scrubs or creams that contain alpha hydroxy acids (AHAs), lactic acid, or urea.
    • Keeping the skin moisturised to reduce dryness.
    • Using mild soaps and lukewarm water instead of hot showers.

With consistent skincare, many people notice improvements in the texture and appearance of their skin.

Infectious Bumps: Boils, Abscesses, and Warts

Boils and Abscesses

Bacterial infections in hair follicles or sebaceous glands can lead to the formation of boils or abscesses. When the infection progresses, you may observe:

  • Redness, swelling, and pain at the site.
  • A hot sensation around the bump.
  • A build-up of pus under the skin.

If a boil does not improve or becomes significantly more painful, medical intervention might be required to drain it and prescribe antibiotics.

Warts

Warts result from the human papillomavirus (HPV). Depending on the subtype of HPV, warts can appear in different forms, such as:

  • Common warts (on hands, fingers)
  • Plantar warts (on feet)
  • Flat warts (often on the face or legs)
  • Genital warts (in the genital area)

Treatments for warts can include salicylic acid applications, cryotherapy (freezing), or prescription creams. Warts are contagious, so covering them and avoiding picking can help limit spread.

When Raised Skin Bumps May Be a Cause for Concern

While most raised skin bumps are benign, there are certain signs that may suggest a more serious condition, such as skin cancer. It is important to observe for:

  • Rapid changes in size
  • Irregular borders
  • Multiple colours within a single bump
  • Bleeding, oozing, or crust formation
  • Persistent itching or pain
  • Development of open sores that do not heal

The ABCDE rule—commonly used for moles—can also be beneficial when examining suspicious lumps or bumps:

  • A for Asymmetry (one half of the lesion differs from the other)
  • B for Border irregularity (poorly defined or ragged edges)
  • C for Colour (shades of brown, black, red, white in one area)
  • D for Diameter (larger than 6 mm, though skin cancer can also be smaller)
  • E for Evolving (changes in size, shape, or colour, or new symptoms like bleeding or itching)

If you notice any of these warning signs, please book an appointment with your GP.

Types of Skin Cancer that Present as Raised Bumps

Basal Cell Carcinoma (BCC)

Basal cell carcinomas are the most common form of skin cancer. They typically appear as small, pearly or waxy bumps that can develop telangiectasia (small blood vessels) on the surface. BCCs are slow-growing and often form in sun-exposed areas such as the face, neck, or ears. Though less likely to metastasise, they can become locally invasive if neglected.

Squamous Cell Carcinoma (SCC)

SCCs may appear as firm, red nodules or scaly patches. They can ulcerate or bleed and frequently develop on sun-exposed areas, like the lips, ears, and hands. SCCs have a higher chance of spreading compared to BCCs, making early detection crucial.

Melanoma

Although commonly associated with dark, pigmented moles, melanoma can also present as a raised bump on the skin. Melanomas typically have irregular borders, multiple colours, and can sometimes bleed. They can develop anywhere on the body, even in areas with minimal sun exposure. Suspected melanomas need urgent referral to the NHS dermatology department for evaluation and diagnosis.

Risk Factors for Developing Raised Skin Bumps

Some individuals are more prone to skin growths or lumps because of various risk factors, which can include:

  • Genetics: Family history of certain conditions, like lipomas or familial skin cancers.
  • Sun Exposure: Chronic sun exposure increases the risk of various skin lesions, including actinic keratoses (precancerous lesions) and skin cancers.
  • Age: As people get older, benign skin lesions (e.g., seborrhoeic keratoses) and some cancers become more common.
  • Medical Conditions: Immune-compromising conditions, diabetes, or chronic skin conditions can increase susceptibility to infections or unusual growths.
  • Hormonal Changes: Pregnant women may be more prone to skin tags or changes in moles.

Diagnosing Raised Skin Bumps

If you are concerned about a raised skin bump, seeking medical advice is the best course of action. A healthcare professional, such as a GP or dermatologist, will likely perform the following:

  1. Medical History: They might ask about your personal and family history, how long the bump has been present, and any related symptoms.
  2. Physical Examination: The doctor will examine the size, shape, texture, and colour of the bump.
  3. Dermatoscopic Evaluation: A dermatoscope can help visualise pigmented lesions more clearly, aiding diagnosis.
  4. Biopsy: If a suspicious bump cannot be definitively diagnosed through inspection alone, a biopsy may be performed. During a biopsy, a small sample of tissue is taken and examined in a laboratory to rule out malignancies.

Treatment Options for Raised Skin Bumps

The management of raised skin bumps depends primarily on the underlying cause, symptoms, and patient preferences. Treatment options can range from simple home care to more involved medical procedures.

Home Remedies and Over-the-Counter Treatments

  • Warm Compresses: Applying a warm compress to a boil or an inflamed cyst can help the lesion drain and potentially relieve discomfort.
  • Topical Treatments: Warts may respond to over-the-counter salicylic acid preparations. Moisturising creams containing urea, lactic acid, or AHAs can help with keratosis pilaris.
  • Good Hygiene: Keeping the area clean and avoiding picking or scratching the bump can help prevent infection.

Prescription Medications

  • Antibiotics: For bacterial infections such as boils or abscesses, your doctor may prescribe oral or topical antibiotics.
  • Antiviral Medications: Certain warts or molluscum contagiosum may respond to antiviral creams, although this is less common.
  • Retinoids: Prescription creams containing retinoids (vitamin A derivatives) may help improve skin turnover for conditions like keratosis pilaris or acne-related bumps.

Minor Surgical Procedures

  • Excision or Drainage: If a cyst becomes infected or a boil does not resolve on its own, minor surgery under local anaesthetic can remove or drain the lesion.
  • Shave Excision or Cryotherapy: Skin tags or raised benign lesions (e.g., some dermatofibromas) can be removed via quick in-office procedures. Cryotherapy uses liquid nitrogen to freeze off warts, tags, or other small bumps.
  • Laser Treatments: Certain vascular lesions or stubborn warts may respond to laser therapy that targets abnormal blood vessels or tissue.

Treatment for Skin Cancer

If a biopsy confirms skin cancer, treatment might involve:

  • Surgical Excision: Removing the lesion and a margin of healthy tissue to ensure complete removal.
  • Mohs Surgery: A highly precise surgical technique often used for basal cell carcinomas or squamous cell carcinomas, particularly in cosmetically sensitive areas like the face.
  • Topical Chemotherapy or Immunotherapy: For certain superficial skin cancers, medicated creams may be prescribed.
  • Radiotherapy: Occasionally used if surgery is not possible or the patient’s medical status precludes more invasive treatments.

Potential Complications of Raised Skin Bumps

Though often harmless, raised skin bumps can lead to complications if not managed properly:

  • Infection: A sebaceous cyst, boil, or abscess can become infected, resulting in pain, fever, and the possible spread of infection.
  • Scarring: Picking at bumps, or repeated trauma to them, may lead to scarring or hyperpigmentation.
  • Spread of Virus or Bacteria: Warts and bacterial infections can spread, creating more lesions on your skin or even passing them to others.
  • Pain and Discomfort: Larger bumps can rub against clothing or cause discomfort, especially when located on pressure points such as the feet.

Early intervention, appropriate medical care, and good hygiene can reduce these risks.

Preventive Measures and Self-Care

While not all raised skin bumps can be prevented—especially those influenced by genetics—there are measures you can take to reduce your risk:

  1. Sun Protection: Limit your exposure to ultraviolet (UV) radiation by wearing sunscreen with a high SPF, seeking shade, and wearing protective clothing (wide-brimmed hats, sunglasses, long sleeves).
  2. Healthy Diet and Hydration: A balanced diet rich in vitamins and minerals supports skin health. Staying well-hydrated maintains skin elasticity.
  3. Maintaining a Healthy Weight: Excess weight can lead to friction areas where skin tags develop.
  4. Proper Skin Hygiene: Cleanse gently, especially if you are prone to boils or cysts. Use lukewarm water and mild soap to avoid irritating the skin.
  5. Avoid Picking: Scratching or squeezing bumps can cause infection or scarring.
  6. Check Your Skin Regularly: Conduct monthly self-examinations to note changes in existing moles or lumps, and be vigilant about new bumps.

When to Seek Medical Advice

Raised skin bumps might seem minor, but medical consultation is recommended if you notice:

  • Sudden growth or changes in a bump’s size or shape.
  • Irregular or poorly defined borders on a pigmented lesion.
  • Persistent pain, itching, or bleeding.
  • Signs of infection (e.g., redness, warmth, pus).
  • The bump simply does not heal or continues to grow.

Your GP may refer you to a dermatologist for expert evaluation. Early diagnosis can make a considerable difference, especially if the bump is cancerous or requires specialist treatment.

Frequently Asked Questions

Are raised skin bumps always serious?

Not always. Many raised skin bumps, such as sebaceous cysts or skin tags, are benign. However, new or changing bumps should be evaluated by a healthcare professional to rule out malignancies or infections.

Can I pop or squeeze a boil or cyst at home?

It is generally best to avoid popping boils or cysts, as it can push the infection deeper into the tissues or cause scarring. Warm compresses and good hygiene are safer approaches. If the bump does not improve or worsens, seek medical advice.

How are skin tags removed?

Skin tags may be snipped off with sterile scissors or scalpel, frozen with liquid nitrogen, or cauterised using heat. Removal usually takes place under local anaesthetic or sometimes no anaesthetic if very small.

Should I be worried if a bump is painful?

Pain might indicate infection or inflammation. Monitor for additional signs like redness, swelling, or pus. If these are present, consult a healthcare professional for assessment and possible treatment.

Can raised skin bumps heal on their own?

Some bumps, like hives or insect bites, often resolve without medical intervention. Others, like warts or cysts, may persist unless treated. Keeping an eye on the lesion and seeking professional advice if needed is the safest approach.

Conclusion

Raised skin bumps vary widely in cause and appearance, and many are harmless. Nevertheless, staying informed about these growths empowers you to take charge of your skin health and ensure timely medical attention when necessary. If you ever feel uncertain about a specific bump—or if it appears suspicious, changes in appearance, or causes discomfort—contact a GP or dermatologist for an expert opinion.

A proactive approach to skin care, including sun protection, regular self-examinations, and healthy lifestyle habits, can significantly lower your risk of serious skin conditions. In addition, maintaining open communication with healthcare professionals ensures you receive the right advice, diagnosis, and treatment options. Whether your raised skin bumps turn out to be benign cysts, persistent warts, or something more concerning, understanding your condition is the first step toward managing it effectively. At CLNQ, our team of skin doctors is available to help diagnose and treat skin lumps and bumps in our clinics in Manchester and Knutsford Cheshire.


Unwanted nose and ear hair can be a persistent nuisance for many people. As we age, these hairs often become thicker, more noticeable, and sometimes even grow in places they never did before. While body hair is a normal part of our biology, the desire to trim, maintain, or permanently remove certain areas of hair …

Unwanted nose and ear hair can be a persistent nuisance for many people. As we age, these hairs often become thicker, more noticeable, and sometimes even grow in places they never did before. While body hair is a normal part of our biology, the desire to trim, maintain, or permanently remove certain areas of hair is understandably common. We will explore why nose and ear hairs grow, the role they play in overall health, and the various methods—both temporary and permanent—for getting rid of them. We will also delve into the safety and effectiveness of professional treatments like laser hair removal and electrolysis. If you are looking for facial hair removal in Manchester then keep reading.

Understanding Nose and Ear Hair

The Role of Nose and Ear Hair in the Body

Nose and ear hair (sometimes called vibrissae when referring to nasal hair) play a functional role in protecting the body. Nose hairs, for instance, help filter out dust, allergens, and other particles from the air we breathe. This filtration system ensures fewer airborne irritants make their way into the lungs. Ear hairs can help trap debris to some extent as well, although their function is less pronounced than nasal hair.

However, when nose or ear hair becomes too dense or starts growing in noticeable tufts beyond the normal confines of the nostril or outer ear, it can be both visually unappealing and, for some individuals, uncomfortable.

Why Nose and Ear Hair Becomes More Prominent with Age

For men in particular, hormonal changes can stimulate increased hair growth in the nose, ears, and eyebrows over time. Dihydrotestosterone (DHT), a derivative of testosterone, is often linked to these changes. This leads to hair that’s coarser, thicker, and more difficult to manage.

Women, too, may notice an increase in hair growth around the face and ears due to hormonal shifts, especially during menopause. While it’s entirely normal to experience these changes, many seek solutions that range from quick fixes like trimming to more permanent methods like laser treatments or electrolysis.

Reasons for Removing Nose and Ear Hair

  1. Aesthetics: Overgrown hair in the nostrils and ear canal can be quite noticeable and is commonly considered undesirable from a cosmetic perspective.
  2. Comfort: Long hairs can tickle the inside of the nose or ear, sometimes causing irritation and itching.
  3. Improved Hygiene: Although some hair is necessary for filtration, excessive hair can trap more debris than is comfortable, potentially leading to odours and irritation if not maintained.
  4. Professional Appearance: Many people in customer-facing roles prefer tidy facial hair, nose hair, and ear hair to maintain a polished look.

Temporary vs. Permanent Hair Removal

Before we delve into permanent methods, it’s worth exploring the standard short-term or temporary techniques. While these methods do not permanently remove hair, they are quick, low-cost, and often sufficient for many people.

Temporary Methods of Hair Removal

  1. Trimming
    • Nose Hair Trimmers: Small, battery-operated trimmers specifically designed with a protective guard to prevent cuts or irritation. They safely shear off visible hairs without removing them too close to the skin, preserving much of the hair’s protective function.
    • Scissors: Some small cosmetic scissors feature blunt or rounded tips for safe nasal hair trimming. It’s essential to use scissors specifically designed for facial hair trimming to reduce the risk of injury.
  2. Waxing
    • Nose Wax Kits: Specifically formulated waxing kits designed for use inside the nostrils. They often include a wax applicator that grips just the protruding hairs. A quick pull removes a cluster of hair.
    • Ear Waxing: Ear waxing can be more challenging due to the shape of the ear canal. Typically, only the outer ear hair is waxed. Caution is needed to prevent wax from getting into the ear canal, which can lead to blockages or burns.
  3. Tweezing
    • While tweezing can be effective for a few stray hairs, it can be quite painful in the nasal region and sometimes cause ingrown hairs or small infections if the follicle becomes irritated. Ear tweezing is more straightforward for any visible hair on the outer ear.
  4. Depilatory Creams
    • Chemical depilatory creams dissolve hairs at the skin’s surface. However, they may not be suitable for inside the nose or ear canal due to the sensitive tissues in these areas. There is also a risk of chemical burns if these creams are used improperly.

While temporary methods are adequate for many individuals, they all require regular upkeep. If you are seeking a more lasting solution, permanent hair removal options may be the way to go.

Permanent Hair Removal Options

The term “permanent” in hair removal should be approached with a degree of realism. No method is 100% guaranteed to remove every single hair follicle forever, but certain techniques can drastically reduce hair growth over a long period or permanently eliminate the majority of hair follicles. The two main professional treatments are laser hair removal and electrolysis.

Laser Hair Removal

How Laser Hair Removal Works

Laser hair removal uses a concentrated beam of light (laser) to target the melanin (pigment) in the hair shaft. The heat generated by the laser damages the hair follicle, reducing its ability to produce hair. Over a series of sessions, treated hairs typically grow back thinner and lighter, and in many cases, hair growth stops altogether in that area.

Suitability for Nose and Ear Hair

Laser hair removal is most commonly used for larger areas such as legs, back, or underarms. However, when it comes to nose and ear hair, great care must be taken. The nasal passages and inner ear canals are sensitive areas, and not all practitioners will be comfortable treating them.

  • Nasal Hair: We offer laser hair removal for the outer rim of the nostrils (where hair is visible). Because the nostril lining is delicate, the laser must be used carefully to avoid burns.
  • Ear Hair: Laser treatment can be done on the outer ear and just inside the ear canal to remove visible hairs. However, the deeper portion of the ear canal is usually not treated with lasers due to safety concerns.

Number of Sessions Required

Laser hair removal requires multiple sessions—often between 4 to 8 for many parts of the body—to achieve an optimal result. The exact number depends on your hair growth cycle, hair colour, skin tone, and the technology used.

Potential Side Effects and Aftercare

  • Skin Irritation: Redness, swelling, or mild discomfort can occur, although these usually subside within a few hours.
  • Pigmentation Changes: Individuals with darker or very light skin should proceed cautiously. Hyperpigmentation or hypopigmentation can occasionally occur.
  • Cost: Laser hair removal can be relatively expensive, particularly for multiple sessions.
  • Aftercare: It is important to keep the treated area clean, avoid direct sun exposure if possible, and follow all instructions from your practitioner to minimise complications.

Laser hair removal for nose and ear hair can be beneficial if done correctly. Book your consultation with our trained therapists at CLNQ. They will guide you and discuss if this is the right option for you and if you are suitable. We will perform a test patch initially to check if you are suitable.

Electrolysis

How Electrolysis Works

Electrolysis is considered one of the only methods approved by the U.S. Food and Drug Administration (FDA) for permanent hair removal. A fine probe is inserted into each individual hair follicle, and a small electric current is delivered to destroy the hair root. Unlike laser hair removal, electrolysis targets each follicle regardless of hair colour or skin tone.

Suitability for Nose and Ear Hair

Electrolysis can theoretically remove hair from almost any part of the body. However, when treating the nose or ears, only an experienced technician or medical professional should perform the procedure because these areas are extremely sensitive, and the structures within them can be delicate.

  • Nasal Hair: The inside of the nostril can be accessed cautiously, though many practitioners only treat the visible rim of the nose.
  • Ear Hair: Electrolysis can tackle hair on the outer ear and around the ear canal opening with minimal risk when performed by an expert.

Number of Sessions Required

Electrolysis typically requires multiple sessions as each individual hair is treated one by one. The number of sessions depends on how dense the hair is, how quickly it grows, and the sensitivity of the area.

Potential Side Effects and Aftercare

  • Discomfort: Some patients experience a slight pricking sensation or mild discomfort during the procedure.
  • Redness and Swelling: After the treatment, minor redness or swelling may occur, which usually subsides within a day or two.
  • Infection Risk: As with any treatment involving skin penetration, there is a small risk of infection if post-treatment care is not followed. Ensuring you go to a reputable clinic significantly reduces this risk.
  • Cost: Electrolysis can be time-consuming and sometimes more costly overall than laser, particularly if you have a large area of hair to treat. However, for small areas like the nose or ears, the overall cost might be more manageable.

Comparing Laser Hair Removal and Electrolysis

  • Effectiveness: Electrolysis is more universally effective on all hair colours, whereas laser hair removal is most effective on dark hairs.
  • Precision: Electrolysis treats one follicle at a time, making it extremely precise but slower. Laser hair removal treats multiple hairs in a single pass.
  • Pain and Discomfort: Both methods can cause mild discomfort. Some people find laser hair removal more tolerable, while others find electrolysis less painful. Often, a topical anaesthetic can be used to ease discomfort.
  • Number of Sessions: Both require multiple sessions, but electrolysis can be more session-intensive due to the hair-by-hair approach.

Are There Other “Permanent” Solutions?

Outside of laser hair removal and electrolysis, other purported permanent solutions (like certain creams or at-home devices) generally offer only partial results or are designed for less sensitive areas. Some at-home laser or IPL (intense pulsed light) devices claim to reduce hair growth, but they often lack the power and precision required to handle nose or ear hair safely and effectively.

Important Considerations and Safety Tips

  1. Preserving Function: Remember that nose and ear hairs are not purely cosmetic. They serve as a protective barrier against foreign particles. Removing them entirely or delving too deep into the nostril or ear canal can raise the risk of infections, dryness, and irritation.
  2. Seeking Professional Advice: Before deciding on any permanent hair removal method, consult a qualified practitioner. This is particularly important if you have underlying health conditions or are taking medications that could affect skin sensitivity or healing.
  3. Realistic Expectations: While some treatments are labelled “permanent,” individual results vary. Many people experience a significant reduction in hair growth, but some might need occasional touch-up treatments over time.
  4. Cost-Effectiveness: Over the long term, permanent hair removal may be more cost-effective than repeated waxing, trimming, or depilatory creams—especially if these temporary measures are performed frequently.

Procedure Experience and Aftercare

1. Pre-Treatment Consultation

Our CLNQ therapists will examine your nose and/or ear area, discuss your hair removal goals, and assess suitability. They will conduct a patch test to ensure your skin reacts well to the treatment.

2. During the Procedure

  • Laser: You will wear protective eyewear, and a cooling gel may be applied to the treatment area. You may feel a snapping sensation as the laser pulses.

3. Aftercare

  • Cleaning and Protecting: Gently clean the area with a mild cleanser and avoid harsh skin products. Refrain from touching or picking at the treated skin to minimise infection risk.
  • Avoid Irritants: For a few days following the procedure, limit activities that cause excessive sweat or expose the skin to potential irritants like chlorine or strong chemicals.
  • Follow-Up Appointments: Multiple sessions are required for optimal results, so stick to the schedule recommended by your practitioner.

Frequently Asked Questions

1. Is it dangerous to remove nose hair permanently?

Any procedure that removes nose hair carries some risk because nasal hair helps filter out impurities. However, if you work with an experienced professional such as therapists at CLNQ in Manchester and only target the visible portions of the nostril, the risk can be managed.

2. Can I do laser or electrolysis at home?

Home-use laser or IPL devices exist, but they’re generally not recommended for the inner nose or ear canal because of the high risk of injury. Electrolysis kits require a level of skill that is best left to trained professionals—especially for sensitive areas like the nose and ears.

3. Will permanent hair removal treatments hurt?

Both laser hair removal and electrolysis can cause mild to moderate discomfort, often described as a stinging or snapping sensation. Topical numbing creams and newer technologies have significantly improved the comfort level of these procedures.

4. How many sessions do I need for permanent removal?

The number of sessions depends on individual factors such as hair density, hair colour, and the specific technology used. Typically, you can expect to need several sessions spaced weeks apart for the best results.

5. What if some hair grows back?

While many people enjoy long-lasting or even permanent reduction, some hair follicles may not be fully destroyed, leading to regrowth. Touch-up treatments can address these persistent hairs.

Conclusion

Unwanted nose and ear hair can be a source of frustration and self-consciousness. Fortunately, there are both temporary and permanent solutions available. For those who want to manage the problem quickly and painlessly at home, trimming, waxing, and tweezing are all effective short-term fixes. However, if you seek a more long-lasting approach, professional treatments such as laser hair removal or electrolysis provide the greatest chances of reducing hair growth permanently.

When it comes to the delicate areas of the nose and ears, safety and expertise are paramount. These procedures should only be performed or supervised by qualified professionals. A consultation with a reputable clinic will help you better understand whether laser or electrolysis is right for you, how many sessions might be required, and what you can expect in terms of results and aftercare.

Finally, it is important to maintain realistic expectations. Permanent hair removal does not always mean absolutely no hairs will ever grow again. Many individuals achieve a significant reduction that makes a big difference in everyday grooming. Whether you opt for a quick trim or choose to invest in a more permanent method, the most important factor is finding a treatment plan you’re comfortable with—one that aligns with both your aesthetic goals and your overall health.

By weighing the advantages, limitations, and potential risks, you can make an informed decision about the best way to tackle unwanted nose and ear hair. With careful planning, professional guidance, and realistic expectations, you’ll be well on your way to enjoying a cleaner, more polished appearance without compromising your comfort or safety.

Moles are common pigmented spots on the skin, and most of us have at least a few of them scattered across our bodies. While many moles are completely harmless, some can become irritated, infected, or even raise concerns about skin cancer. It can be tempting to try at-home remedies or DIY techniques to remove an …

Moles are common pigmented spots on the skin, and most of us have at least a few of them scattered across our bodies. While many moles are completely harmless, some can become irritated, infected, or even raise concerns about skin cancer. It can be tempting to try at-home remedies or DIY techniques to remove an unwanted mole, but this approach is fraught with risks and potential complications. We will explore why you should never attempt mole removal at home, the hazards involved, and the benefits of seeking professional medical advice. We will delve into diagnostic considerations, possible adverse outcomes, and the importance of understanding skin health and disease prevention.

Understanding Moles

Moles, medically referred to as melanocytic naevi, are areas of increased pigmentation in the skin. They can vary in size, shape, and colour, often appearing as small, dark spots. Most moles are benign (non-cancerous), and many people live with them without any issues. However, changes in the size, shape, or colour of a mole, or the development of new ones, can sometimes be an early sign of something more serious, such as melanoma or other forms of skin cancer.

Types of Moles

  • Congenital Moles: These are present at birth or develop in infancy. Larger congenital moles may carry a slightly increased risk of skin cancer, depending on factors like size and appearance.
  • Acquired Moles: These appear during childhood or early adulthood. Their development is often linked to genetics and sun exposure.
  • Atypical (Dysplastic) Moles: These can have irregular borders, varied coloration, and might be larger than a common mole. Atypical moles should be monitored more closely, as they can carry a higher risk of malignancy.

The main thing to remember is that you cannot definitively know whether a mole is harmless just by looking at it. This is where a qualified medical doctor, such as a GP, dermatologist, or plastic surgeon, can help determine the nature of the mole through clinical examination and, if necessary, additional tests or a biopsy.

Why People Are Tempted to Remove Moles at Home

In an age where the internet provides countless do-it-yourself (DIY) tutorials, there is a growing trend towards at-home cosmetic procedures. Social media platforms, such as YouTube or Tiktok, can be riddled with videos demonstrating unsafe and untested methods. Some of the primary reasons people might consider removing moles at home include:

  1. Convenience: Visiting a doctor requires time, appointments, and, in some cases, a referral from your GP. Some individuals believe DIY methods are a shortcut.
  2. Cost Concerns: Private medical procedures can be expensive, and while certain mole removals may be covered by the NHS if they are deemed suspicious or symptomatic, purely cosmetic removals often come at a cost. Mole removal cost can be an important factor but you should never compromise your health.
  3. Misinformation: Online platforms can spread misleading or incomplete information. People may falsely believe that certain oils, creams, or household chemicals can ‘safely’ burn, freeze, or dissolve a mole.
  4. Embarrassment or Fear: Some individuals might feel anxious about having a noticeable mole examined or removed by a professional. They may avoid a medical consultation due to fear of what they might discover.

However, it is crucial to understand that at-home mole removal is rarely safe, accurate, or effective. Beyond the immediate health risks, there is the potential to overlook serious medical conditions if a mole is not assessed by a professional.

Risks of At-Home Mole Removal

The idea of ‘just snipping off’ a mole or using online remedies is often fuelled by myths about ease or quick fixes. In reality, there are several significant risks that accompany at-home mole removal:

  1. Infection: Cutting, burning, or using chemicals on the skin without proper sterilisation techniques can introduce bacteria, leading to infections such as cellulitis or abscess formation. Infection can result in pain, swelling, fever, and even more severe health complications if left untreated.
  2. Scarring: DIY mole removal techniques can lead to unsightly scarring or disfigurement. Even if you think your makeshift procedure went smoothly, scar tissue can form unpredictably, leaving raised, pitted, or discoloured marks far worse than the original mole.
  3. Incomplete Removal: Without medical expertise, it can be difficult or impossible to ensure the entire mole, particularly any deeper pigmented cells, has been removed. Incomplete removal could cause the mole to grow back, sometimes more aggressively, or leave behind abnormal cells.
  4. Misdiagnosis or Overlooking Cancer: One of the most important reasons to avoid at-home removal is the risk of missing a potential malignancy. An apparently harmless mole could be an early-stage melanoma. Removing it incorrectly or incompletely may mask further changes or spread, potentially delaying a proper diagnosis and necessary treatment.
  5. Bleeding: Many moles have a blood supply. Attempting to remove them can cause significant bleeding, especially if you cut into the dermal layers. Uncontrolled bleeding increases the risk of infection and can require emergency care if severe.
  6. Chemical Burns: Many individuals resort to unregulated topical products or homemade pastes containing strong acids, bases, or other caustic substances. These can burn not only the mole but also the surrounding healthy skin, sometimes causing blistering and long-term damage.

Because of these potential complications, professional guidelines from reputable sources such as the British Association of Dermatologists (BAD) and the National Health Service (NHS) strongly advise against attempting mole removal at home.

The Role of Proper Diagnosis

Moles may seem like minor imperfections, but they can provide early warning signs of skin cancer or other skin conditions. Proper diagnosis is key to safe and effective treatment. The ‘ABCDE’ method is often recommended for self-examination:

  • A – Asymmetry (one half of the mole doesn’t match the other)
  • B – Border (uneven, notched, or scalloped borders)
  • C – Colour (uneven colour or multiple shades)
  • D – Diameter (larger than 6 mm, though skin cancers can be smaller)
  • E – Evolving (changes in size, shape, colour, or any new symptom like bleeding or itching)

If you notice any of these warning signs or are unsure about the appearance of a mole, the correct step is to consult a doctor. They may perform an examination, and some may use dermoscopy, a type of magnified inspection, and decide whether a biopsy is needed. A biopsy is the only definitive way to confirm whether cells are benign or malignant. Relying on guesswork at home can lead to a missed or delayed diagnosis that could have serious health consequences if the mole is cancerous.

Professional Mole Removal Methods

Medical clinics, such as CLNQ in Manchester and Cheshire, offer various professional techniques for mole removal, each chosen according to the type, size, location, and nature of the mole. These methods are performed under sterile conditions by qualified professionals such as dermatologists, plastic surgeons, or specially trained doctors. Some of the most common professional mole removal techniques include:

  1. Surgical Excision This is one of the most common methods. The mole and a margin of surrounding tissue are removed under local anaesthetic. The wound is then closed with sutures. Surgical excision ensures that the mole is removed completely, and a sample can be sent to the laboratory for histopathological examination to rule out malignancy.
  2. Shave Excision In this procedure, a surgical blade is used to remove the raised portion of the mole, often resulting in a slightly flatter area. If there are any concerns about the nature of the mole, a tissue sample can still be examined.
  3. Laser Removal A laser may be used for certain superficial, benign moles. However, laser mole removal is generally reserved for moles with a low risk of malignancy, as it may not always provide a sample for laboratory analysis.
  4. Cryotherapy This method involves freezing the mole with liquid nitrogen. It is more commonly used for certain pre-cancerous lesions (like actinic keratoses) or warts, and might not be ideal for suspicious moles, as obtaining tissue for pathology can be difficult.

Each professional approach minimises the risks of infection, controls bleeding, and provides an accurate and safe means to evaluate the removed tissue. Furthermore, our doctors will offer you aftercare instructions and follow-up appointments to monitor the healing process.

The Importance of Aftercare

The healing process after mole removal is just as crucial as the procedure itself. Proper aftercare helps reduce the risk of infection and scarring. By removing a mole at home, you are not likely to receive the crucial follow-up and professional guidance needed for optimal healing. Aftercare typically involves:

  • Keeping the Area Clean: Following our advice on gentle cleaning techniques.You will usually have a dressing on initially.
  • Using Prescribed Ointments or Dressings: These can help protect the wound and aid the healing process.
  • Avoiding Sun Exposure: Keeping the area protected from UV rays helps reduce pigmentation changes and scarring.
  • Reporting Any Complications: If you notice increased redness, swelling, discharge, or pain, you should promptly inform the team at CLNQ.

When you resort to DIY procedures, it’s easy to overlook these necessary steps or ignore signs of complications until they are severe.

Protecting Your Skin and Spotting Warning Signs

Instead of trying to remove a mole at home, focus on proactive skin health and preventive measures. Regular skin checks, coupled with professional evaluations, can help you detect and address any issues early on.

  1. Regular Self-Exams Performing monthly skin checks helps you become familiar with your moles and notice any new or changing lesions. Use the ‘ABCDE’ criteria as a guide.
  2. Annual Professional Check-Ups If you have multiple moles, atypical moles, or a family history of skin cancer, it’s wise to schedule yearly skin examinations with a dermatologist or specialised healthcare professional.
  3. Sun Protection Since excessive sun exposure can lead to the formation of new moles and increase the risk of skin cancer, protect your skin with broad-spectrum sunscreen (SPF 30 or higher), wear protective clothing, and avoid tanning beds. The British Association of Dermatologists advises that you reapply sunscreen every two hours, especially if swimming or perspiring.
  4. Avoid Picking or Irritating Moles Accidentally scratching or picking at a mole can cause bleeding and, in some cases, infection. If you have a mole that is easily irritated by clothing or jewellery, seek professional advice for removal rather than attempting it yourself.
  5. Know Your Family History Genetics play a significant role in skin health. A family history of melanoma or numerous atypical moles means you may be at a higher risk, making professional check-ups even more essential.

Conclusion

Moles may be a normal part of your skin, but they can also be a sign of developing issues. Attempting to remove them at home is risky, unregulated, and could lead to infection, scarring, incomplete removal, and misdiagnosis. The only reliable way to know if a mole is benign is to have it assessed by a healthcare professional who can provide a thorough examination and, if necessary, a biopsy or mole removal in Manchester.

By choosing professional mole removal at CLNQ with our expert doctors instead of a DIY approach, you protect both your skin’s health and appearance. The peace of mind that comes from an accurate diagnosis and expert care far outweighs any perceived convenience or cost savings from at-home methods. Remember, your skin is the largest organ of your body, serving as your first line of defence against the environment. It deserves proper attention and care, especially when it comes to procedures that could have long-term implications for your health.

If you are concerned about a specific mole or have questions about your skin, book a consultation with our specialist team at CLNQ now. They will guide you through the next steps, whether that involves monitoring a particular mole, removing it for peace of mind or medical necessity, or providing further diagnostic testing. We will guide you as to which is the most suitable method of removal for your specific mole.

Tanning is a topic that captures widespread interest, particularly as warmer months approach or when planning a holiday abroad. However, sun exposure involves much more than simply gaining a golden glow; it encompasses your skin’s overall health, risk of sun damage, and likelihood of developing conditions such as sunburn and long-term skin problems. One of …

Tanning is a topic that captures widespread interest, particularly as warmer months approach or when planning a holiday abroad. However, sun exposure involves much more than simply gaining a golden glow; it encompasses your skin’s overall health, risk of sun damage, and likelihood of developing conditions such as sunburn and long-term skin problems. One of the primary ways to evaluate safe sun exposure is through understanding the UV index. We will explore what the UV index is, why it matters, and how you can use it to determine the best time and level of exposure to achieve a tan responsibly and safely. We will also look at guidelines from reputable organisations such as the NHS and Cancer Research UK, and discuss practical advice on skin protection, sunscreen use, and the balance between obtaining vitamin D and minimising skin damage.

Understanding UV Radiation and the UV Index

Ultraviolet (UV) radiation is part of the electromagnetic spectrum emitted by the sun. It is typically divided into three categories based on wavelength:

  1. UVA (Ultraviolet A): This has the longest wavelength of the three and can penetrate deeper into the skin. UVA is associated with photo-ageing—such as wrinkles, loss of skin elasticity, and pigmentation changes—as it can damage deeper layers of the skin over time.
  2. UVB (Ultraviolet B): This mid-range wavelength is mainly responsible for sunburn and is a critical factor in skin cancer development. Despite this risk, UVB also plays a role in vitamin D synthesis in the skin.
  3. UVC (Ultraviolet C): The shortest wavelength, UVC is mostly absorbed by the Earth’s ozone layer and does not typically reach the surface in significant amounts.

What is the UV Index?

The UV index is an international standard measurement developed by the World Health Organization (WHO). It provides a forecast of the expected risk of overexposure to UV radiation. The higher the index value, the greater the potential for harm to your skin and eyes, and the less time it takes for damage to occur.

The index generally ranges from 1 to 11+, with the following rough guide:

  • UV index 1-2 (Low): Minimal risk for most people.
  • UV index 3-5 (Moderate): Slightly higher risk. Sun protection (e.g., sunscreen, hats, sunglasses) is advisable, especially if you will be outside for extended periods.
  • UV index 6-7 (High): There is a high risk of harm from unprotected sun exposure. Protective measures are critical—seek shade, wear covering clothing, sunglasses, and a broad-spectrum sunscreen with a high SPF.
  • UV index 8-10 (Very High): Very high risk of harm from unprotected sun exposure. You should take extra precautions, such as wearing protective clothing, using sunscreen liberally, and avoiding prolonged outdoor activities during midday.
  • UV index 11+ (Extreme): Extreme risk of harm from unprotected sun exposure. Avoid being in direct sunlight for prolonged periods, and use very stringent protective measures.

By checking daily weather reports or using free smartphone apps, you can monitor the UV index in your location, ensuring that you time your outdoor activities or sunbathing sessions more safely.

The Tanning Process: Melanin and UV Exposure

To understand the best UV index for tanning, it is essential to first grasp what tanning involves. Tanning is your skin’s defence mechanism against excessive UV exposure. When UV rays reach the skin, they stimulate melanocytes—cells in the epidermis—to produce melanin, the pigment that gives skin its colour. An increase in melanin leads to the darkening or tanning effect.

However, this defensive response is also a sign of DNA damage in your skin cells. While a light tan may be seen as desirable aesthetically, it is essentially your skin’s attempt to protect itself from harmful UV radiation. Continued or repeated exposure beyond safe limits can lead to sunburn, premature ageing, and potentially skin cancer.

What is the “Best” UV Index for Tanning or Safe Tanning?

Many people want to find the ‘sweet spot’ on the UV index scale that allows them to develop colour without significant risk of sunburn or other skin damage. While there is no universal, foolproof number that guarantees “safe tanning,” moderate UV index levels often allow for more controlled sun exposure.

  • UV index 3-5: This is typically considered a moderate range. At this level, you can usually develop some colour if you stay outdoors for a measured period. However, it is still possible to burn if you have fair skin, are not used to sun exposure, or spend too long in direct sunlight without protection.
  • UV index 6-7: Moving into the high range. Tanning occurs more quickly, but so does the potential for burning. People with fair or sensitive skin should exercise extra caution, limiting direct sun exposure and using high-SPF, broad-spectrum sunscreen.
  • UV index 1-2: Tanning is still possible, albeit very slowly. Prolonged exposure without protection is rarely recommended because even lower UV indexes can accumulate damage over time. For individuals with darker skin tones, minimal changes might be observed at these low levels.

It is helpful to remember that sun exposure should be gradual. Whether you are hoping to develop a tan or simply enjoy the outdoors, building your exposure to sunlight over days and weeks is far safer than an intense burst of exposure at higher UV levels.

Striking a Balance: Vitamin D vs. Skin Safety

A key argument in favour of some degree of unprotected sun exposure relates to vitamin D synthesis. This vitamin is crucial for bone health, immune function, and other bodily processes. When UVB rays hit the skin, a cascade of reactions produces vitamin D3, which is then converted to the active form in the body.

  • Moderation is key: Organisations like the NHS note that most people can produce sufficient vitamin D with brief intervals of sun exposure between March and September in the UK—often as little as 10 to 15 minutes a few times a week on arms and legs, depending on your skin type and the UV index.
  • Supplementation: If you are concerned about vitamin D deficiency, you might consider supplementation, especially during the winter months. This option allows you to maintain healthy vitamin D levels without exposing your skin to harmful UV radiation. At CLNQ, we offer Vitamin D shots to help boost levels.

It is best to consult your GP or skin doctor at CLNQ for guidance tailored to your individual needs, particularly if you have medical conditions that affect vitamin D metabolism or if you have a history of skin cancer.

Factors Affecting Tanning and Sun Exposure

Even if the UV index is moderate, various factors can influence your level of UV exposure and the rate at which you tan or burn:

  1. Skin Type: Generally, fairer skin is more prone to burning and produces melanin more slowly. Darker skin tones have more natural protection (due to higher melanin levels), but they are not immune to sun damage.
  2. Altitude: UV radiation is more intense at higher altitudes, since there is less atmosphere to filter the sun’s rays.
  3. Reflection: Surfaces such as water, sand, snow, and concrete can reflect UV radiation, effectively increasing your sun exposure. This is why beach holidays or skiing trips can lead to sunburn even if it feels cool.
  4. Cloud Cover: Clouds do not completely block UV rays; in some cases, thin cloud cover can even magnify UV radiation through reflection, leading to unexpected sun damage.
  5. Time of Day: The sun’s rays are strongest between approximately 10am and 4pm. During these peak hours, the UV index tends to be higher.

Practical Guidelines for Safe Tanning

1. Check the UV Index Daily

Make a habit of looking up the UV index in your area (via weather apps, websites, or your local forecast). If the reading is moderate (3-5), you can plan for a short sunbathing session, but still use protection and monitor your skin for signs of redness.

2. Use Sunscreen Properly

Sunscreen is one of the most reliable defences against UV damage. Recommendations include:

  • Broad-spectrum sunscreens: These products block both UVA and UVB rays.
  • SPF 30 or higher: In the UK, the NHS recommends a minimum SPF of 30. However, individuals with fair or sensitive skin, or those planning prolonged sun exposure, may opt for SPF 50 or higher for increased protection.
  • Reapplication: Sunscreen should be reapplied every two hours or immediately after swimming or sweating.
  • Quantity: Apply a generous amount. An insufficient layer of sunscreen is a common mistake. Adults generally need roughly two tablespoons of sunscreen to adequately cover their entire body.

3. Gradual Exposure

If you are seeking a tan, consider starting with short, 10- to 15-minute sessions of direct sun exposure, applying sunscreen before you go outside. Gradually increase the duration over several days or weeks, paying close attention to your skin’s response.

4. Wear Protective Clothing and Sunglasses

wide-brimmed hat and UV-protective sunglasses can shield delicate areas like your face and eyes from harm. Loose, long-sleeved clothing can also provide extra protection if the sun intensity is higher or if you are prone to burning easily.

5. Stay Hydrated

Skin is the largest organ, and staying hydrated benefits your overall health, including the health of your skin. Additionally, drinking water during sunny days can help you feel more comfortable and reduce the chance of heat exhaustion.

6. Avoid Artificial Tanning Methods

Artificial tanning beds emit high levels of UV radiation, including UVA and UVB, which may significantly increase the risk of skin cancer, according to studies. The general medical consensus strongly advises against the use of tanning beds.

Recognising Signs of Overexposure

Even if you are adhering to a moderate UV index, there may be times your skin reacts poorly. Signs of overexposure include:

  • Skin Redness: This is often the first sign of sunburn, and can worsen even after you have moved indoors.
  • Tenderness or Pain: If your skin feels hot or painful to the touch, you have likely experienced a burn.
  • Peeling: Peeling usually follows a sunburn and is a visible sign of damaged skin cells being shed.
  • Blisters: More severe sunburn can lead to blisters and should be taken seriously; you may need to consult a healthcare professional if the burn is extensive.

Should you notice any of these signs, move out of direct sunlight immediately, and apply after-sun lotion or a cool compress to the affected area. Consider seeking medical advice if the burn is painful, blistering, or covers a large portion of your body.

Tanning Myths and Misconceptions

Because tanning is such a popular topic, misinformation abounds. Let us clarify some common myths:

  1. Myth: A base tan will protect you from sunburn. Reality: A tan provides minimal protection (roughly equivalent to an SPF of 2-4, according to some estimates). This offers negligible safeguarding against UV damage.
  2. Myth: You cannot get sunburned on cloudy or cooler days. Reality: UV rays can penetrate clouds, and you can still suffer from sunburn in cool or breezy conditions. Always check the UV index and act accordingly.
  3. Myth: Darker skin does not need sunscreen. Reality: While darker skin has a higher melanin level and may be less prone to sunburn, it is still susceptible to damage, including the risk of skin cancer. Sunscreen is recommended for all skin tones.
  4. Myth: The sun is the only source of vitamin D. Reality: Although sun exposure is a primary source, vitamin D can be obtained through diet (e.g., oily fish, fortified cereals) or supplements. Relying solely on unprotected sun exposure is not advisable due to the risks involved.
  5. Myth: Sunscreen prevents tanning entirely. Reality: Even if you wear a high-SPF sunscreen, you can still develop a tan. Sunscreen moderates UV exposure to lessen the risk of burning, but some tanning will still occur over time.

The Role of Healthcare Professionals

Dermatologists and other skin doctors play a pivotal role in advising patients on sun safety. If you have concerns regarding unusual moles, changes in your skin, or a personal or family history of skin cancer, book a consultation with our team at CLNQ. Our team can also provide guidance on:

  • Skin examinations: Checking moles and lesions for signs of malignancy. We offer mole removal and laser mole removal.
  • Vitamin D testing: Determining whether you are deficient, particularly if you have minimal sun exposure or certain health conditions. We can offer vitamin D injections to help improve levels.
  • Sun protection strategies: Personalised advice on skincare products and regimens suitable for your skin type.

Achieving a Responsible Tan

While seeking a tan is common for aesthetic reasons, it is imperative to remember that no tan is truly “safe.” When the skin darkens, it indicates that your body is protecting itself from DNA damage caused by UV rays. Nonetheless, if you do wish to tan, following these best practices can help you do so more responsibly:

  1. Aim for sun exposure when the UV index is in the moderate range (around 3-5), using adequate sun protection.
  2. Limit the duration of direct sun exposure, especially if you have fair or sensitive skin.
  3. Use a broad-spectrum sunscreen with an SPF of 30 or higher, applying it generously and reapplying every two hours.
  4. Balance your vitamin D needs with the risk of skin damage by considering short, sensible periods of sun exposure, and discuss supplementation with a doctor if necessary.
  5. Pay attention to signs of overexposure—redness, tenderness, or blisters—and seek prompt medical help if you experience severe sunburn.
  6. Understand that tanning beds are not a safe alternative. They often emit stronger UV radiation that can significantly increase skin cancer risk.

Conclusion

Finding the “best” UV index for tanning is all about striking the right balance between enjoying the sun and preserving the health of your skin. While an index of 3-5 may allow for gradual tanning, safe sun habits should remain your priority at all times. Wear protective clothing, use broad-spectrum sunscreen, stay hydrated, and limit the time you spend in direct sunlight—these steps reduce your risk of sunburn, photo-ageing, and the potential development of skin cancer.

As a general rule, if you are in doubt, err on the side of caution. The sun’s rays can be deceptively strong, and damage can accumulate even when you do not see immediate results such as redness or peeling. Regular use of sun protection need not eliminate your chance of achieving a subtle, healthy-looking tan, but it will help to ensure that your skin remains healthier for longer. Always consult a doctor if you have ongoing concerns about sun exposure, vitamin D levels, or if you notice suspicious changes on your skin. By educating yourself about the UV index and following sensible guidelines, you can enjoy the benefits of sun exposure—whether that is a light tan or just feeling relaxed outdoors—while minimising the risks.

A nose thread lift is a minimally invasive cosmetic procedure designed to elevate and reshape the nose using specially formulated threads. Unlike surgical rhinoplasty, which involves incisions and adjustments to the nasal bone and cartilage under general or local anaesthesia, a nose thread lift typically requires only local anaesthetic, with significantly reduced downtime. The popularity …

A nose thread lift is a minimally invasive cosmetic procedure designed to elevate and reshape the nose using specially formulated threads. Unlike surgical rhinoplasty, which involves incisions and adjustments to the nasal bone and cartilage under general or local anaesthesia, a nose thread lift typically requires only local anaesthetic, with significantly reduced downtime. The popularity of nose thread lifts has grown rapidly in recent years, especially amongst those seeking a more refined nasal appearance without the commitment and recovery associated with traditional surgery.

We will delve into everything you need to know about nose thread lifts. We will explore how this procedure works, potential benefits and risks, what to expect during the treatment, and the kind of results you can anticipate. By the end of this blog, you should have a thorough understanding of nose thread lifts, helping you make an informed decision about whether this procedure might be right for you.

How Does a Nose Thread Lift Work

A nose thread lift relies on the strategic placement of specialised, bioresorbable threads underneath the skin of the nose. Typically, these threads are composed of polydioxanone (PDO) or similar materials such as poly-L-lactic acid (PLLA). PDO has been used for many years in surgical sutures due to its safety profile and ability to dissolve over time. When inserted into the nose, these threads can help provide support, shape, and lift by harnessing the body’s natural healing and collagen production processes. PDO thread lifts are commonly performed for the rest of the face and jawline.

Threads and Collagen Stimulation

One of the advantages of thread-based procedures is that they stimulate collagen production. Collagen is a key structural protein that helps maintain firmness and elasticity in the skin and soft tissue. When the threads are placed in the nasal area, the body recognises them as foreign bodies and triggers a mild inflammatory response. This process naturally boosts collagen synthesis around the threads, aiding in improved tissue support and contour over time.

Areas of the Nose Addressed

A nose thread lift can help reshape various aspects of the nose, including:

  • Nasal Bridge: Adding height or definition to a flat or low nasal bridge.
  • Nasal Tip: Providing subtle lift or refinement to the tip of the nose.
  • Nasal Profile: Offering a straighter or more contoured side profile, especially in those with minor irregularities or subtle bumps.

Although thread lifts can address certain aesthetic concerns, they are not a substitute for surgical rhinoplasty if structural issues or significant reshaping is required. For those who require only modest adjustments, or who prefer to avoid surgery, a nose thread lift can be an attractive option.

Who Is a Good Candidate for a Nose Thread Lift?

While many people might consider a nose thread lift to enhance or refine their nasal appearance, it is important to determine whether this procedure aligns with your personal goals and anatomy. You may be a suitable candidate if you:

  1. Desire a Subtle Enhancement: Nose thread lifts typically provide mild to moderate improvements, such as raising a slightly droopy tip or adding gentle definition to the bridge. If you are seeking a major transformation, you might be better suited for a surgical approach.
  2. Have Realistic Expectations: As with any cosmetic procedure, it is essential to have realistic expectations regarding the outcome. A nose thread lift can create refinement and balance, but it will not completely alter fundamental nasal features.
  3. Prefer a Minimally Invasive Approach: The avoidance of incisions, less downtime, and a lower risk profile are key reasons why people choose a thread lift over surgery.
  4. Are in Good General Health: Being in good health ensures your body heals properly, minimising the risk of complications and prolonging the benefits of the procedure.
  5. Have No Untreated Nasal or Sinus Issues: Although a thread lift does not physically alter the nasal passages, it is wise to address existing sinusitis or nasal infections before undergoing the procedure.

Book your consultation with our specialists at CLNQ to determine whether a nose thread lift can achieve the specific changes you desire. Our experts can perform nose thread lifts in Manchester or Cheshire.

Nose Thread Lift Before and After

This patient underwent a nose thread lift to help lift the tip of the nose

Benefits of a Nose Thread Lift

A nose thread lift has several advantages that make it an appealing choice:

  1. Minimal Downtime: One of the greatest benefits of this procedure is the short recovery period. Most individuals can resume work or social events within 24 to 48 hours, provided they follow post-treatment advice.
  2. Reduced Discomfort: Since the treatment is performed under local anaesthesia, you remain awake but experience minimal pain. Moreover, the small gauge needles or cannulas used for inserting the threads further decrease discomfort.
  3. Immediate Results: Although the best outcomes often manifest over a few weeks as collagen production ramps up, many people notice an immediate difference in the shape and height of their nose right after treatment.
  4. Non-Permanent: For those hesitant about irreversible changes, the fact that the threads dissolve over time can be reassuring. If, for any reason, you are not satisfied with the final look, the nose will eventually return to its original shape once the threads have dissolved, typically in around 6 to 12 months. Collagen stimulation effects, however, may last longer.
  5. Collagen Boost: The threads trigger collagen production in the nose, leading to firmer, more youthful-looking skin in that area. This boost in collagen can help maintain a refined nasal shape for longer, especially with maintenance treatments.

Preparing for Your Nose Thread Lift

Although a nose thread lift is relatively simple, preparation is an essential step to ensure a smooth experience and optimal results. Below are a few recommendations:

  1. Initial Consultation: During the consultation, you should discuss your goals, any medical conditions, and your full medical history.
  2. Discuss Expectations: Clarify what you hope to achieve. Bring reference photos if needed, but keep in mind your results will depend on your existing anatomy and the practitioner’s professional judgement.
  3. Review Medications: Certain medications, such as blood thinners or non-steroidal anti-inflammatory drugs (NSAIDs), may need to be paused or adjusted beforehand to reduce the likelihood of excessive bruising. Always follow medical advice and do not modify any prescriptions on your own.
  4. Avoid Alcohol and Smoking: Alcohol can increase the risk of bleeding and bruising. Smoking, on the other hand, impairs circulation and can slow healing. It is wise to avoid both in the days preceding the procedure.
  5. Plan Your Schedule: Even though downtime is minimal, you should schedule your treatment when you can allow for at least a couple of days to rest and recover. This will help minimise the chance of complications.

The Nose Thread Lift Procedure: Step by Step

  1. Cleansing and Anaesthesia: On the day of your nose thread lift, the doctor will begin by cleansing the treatment area thoroughly to minimise infection risk. Local anaesthesia is administered around the nose to ensure you experience minimal discomfort during the thread placement.
  2. Marking the Nose: Next, the doctor may mark key areas of the nose to guide the precise placement of threads. This mapping step is crucial to achieving the desired shape and lift.
  3. Thread Insertion: Using a fine needle or cannula, the doctor will insert the threads underneath the skin. The number of threads used depends on the amount of lift or reshaping needed. Each thread contains tiny barbs or cones that help anchor the thread in place and provide structural support.
  4. Adjusting and Trimming: Once all threads are in position, the doctor will gently adjust them to ensure the nasal shape is symmetrical and refined. Any excess thread is trimmed.
  5. Sterile Dressings: Finally, the treatment area may be cleansed again, and you may receive a light dressing or protective covering as needed. The entire procedure typically takes around 30 to 45 minutes, although time can vary depending on individual complexity.

Aftercare and Recovery

Immediate Post-Treatment Guidance

  • Gentle Handling: Refrain from excessive touching or manipulating the nose. Avoid rubbing your face vigorously, and be mindful of how you sleep or rest to prevent direct pressure on the nose.
  • Cold Compresses: To reduce swelling or bruising, apply a cold compress (wrapped in a cloth to avoid direct contact) for short intervals.
  • Pain Management: You may experience mild discomfort, tenderness, or swelling during the first few days. Over-the-counter pain relievers, such as paracetamol, can help.

Activities to Avoid

  • Strenuous Exercise: Avoid intense physical activities, including heavy lifting or vigorous exercise, for at least a week. Elevated blood pressure may increase the risk of bruising or disrupt the threads.
  • Facial Treatments: Steer clear of facials, massages, or any aesthetic treatments around the nose for a minimum of two weeks. Such treatments could displace the threads or interfere with initial healing.
  • Saunas and Steam Rooms: Excessive heat can exacerbate swelling, so it is wise to avoid saunas, steam rooms, and very hot baths for at least the first week post-procedure.

Long-Term Care

Although the threads dissolve over time, you can extend the longevity of your results by:

  • Maintaining a healthy skincare routine to support collagen production
  • Minimising sun exposure and using sunscreen to reduce photoageing
  • Following any personalised advice offered by doctor at CLNQ

Potential Risks and Complications

A nose thread lift is considered relatively safe, but, like any cosmetic procedure, it carries certain risks. Common side effects include:

  • Swelling and Bruising: Typically mild and resolves within a few days to a week.
  • Infection: As with any procedure involving injections or incisions, infection is a possibility. Proper sterilisation and post-treatment care greatly reduce this risk.
  • Thread Migration: In rare cases, threads can become displaced or migrate from their intended position. Your doctor may recommend a correction procedure if this occurs.
  • Asymmetry: Minor unevenness is possible, particularly if the nose had pre-existing asymmetries. An experienced practitioner can help minimise this issue.
  • Allergic Reactions: Though rare with PDO or PLLA threads, any foreign material in the body can present a risk of allergic reaction. Always inform us of any allergies or prior adverse reactions to medical devices or materials.
  • Extrusion: Extrusion of the threads is uncommon but can also happen.

If you notice significant redness, persistent swelling, or signs of infection such as fever or discharge, contact us at CLNQ.

How Long Does a Nose Thread Lift Last?

One of the appealing aspects of a nose thread lift is the relatively quick onset of visible results. You might see an immediate enhancement in the height or definition of the nose immediately after the threads have been inserted. However, over the following weeks, your body will develop additional collagen around the threads. This process can further refine and support your new nasal contour.

As for how long the results last, most threads dissolve anywhere between 6 to 12 months after insertion. Collagen stimulation, meanwhile, can prolong the aesthetic improvements for a few months beyond that timeframe. Many people schedule touch-up appointments every 9 to 12 months to maintain a consistent look. Ultimately, the duration of your results will depend on factors such as thread type, your lifestyle, metabolism, and individual biology.

Comparing Nose Thread Lifts to Other Nose Enhancement Options

In order to choose the best treatment for your cosmetic goals, it is helpful to compare a nose thread lift with other popular nose enhancement methods:

Surgical Rhinoplasty

  • Invasive Level: High (requires incisions, anaesthesia)
  • Recovery: Longer downtime (1–2 weeks of noticeable swelling and bruising, with full healing over several months)
  • Results: Permanent changes to bone and cartilage, suitable for significant reshaping
  • Advantages: Drastic, long-lasting improvements
  • Disadvantages: Longer recovery, higher cost, potential surgical risks

Non-Surgical Rhinoplasty with Dermal Fillers

  • Invasive Level: Mild (involves injections only)
  • Recovery: Minimal downtime
  • Results: Last roughly 6–18 months (depending on filler type)
  • Advantages: Quick procedure, reversible (with hyaluronidase for hyaluronic acid fillers)
  • DisadvantagesNose fillers primarily add volume (may not be ideal for reducing nostril flare or very large humps), risk of vascular complications in rare cases

Nose Thread Lift

  • Invasive Level: Mild to Moderate
  • Recovery: Minimal downtime (1–3 days)
  • Results: Subtle lift and contour lasting 6–12 months
  • Advantages: Stimulates collagen, relatively straightforward procedure, immediate lift
  • Disadvantages: Not suitable for major structural changes, threads eventually dissolve

Frequently Asked Questions

1. Is a Nose Thread Lift Painful?

Most patients report minimal discomfort, as local anaesthesia is used. Some pressure or tugging might be felt as the threads are inserted, but this is generally tolerable and brief.

2. When Will I See the Final Results?

You can see some immediate improvement, particularly to the nasal bridge or tip. However, the most refined results typically appear several weeks later, once the body has produced new collagen around the threads.

3. Can I Wear Glasses After a Nose Thread Lift?

Yes, though it is recommended to avoid placing pressure on the bridge of the nose immediately after the procedure. If you do wear glasses, choose lightweight frames and keep an eye out for any discomfort or unusual bruising.

4. Can the Threads Break?

Modern PDO or PLLA threads are quite durable when placed correctly, but excessive manual force or injury to the nose soon after treatment could potentially dislodge or damage them. Following your practitioner’s aftercare instructions greatly reduces this risk.

5. How Many Threads Will I Need?

The number of threads required varies from person to person based on the degree of correction. It could range from a few threads to support the bridge or tip to several more threads if multiple areas need addressing.

Conclusion

A nose thread lift offers a minimally invasive way to refine, elevate, and contour the nose without resorting to traditional surgery. By harnessing bioresorbable threads that stimulate collagen production, this procedure provides subtle but noticeable enhancements. It is particularly well-suited for individuals seeking mild to moderate changes, with the added benefit of minimal downtime and a favourable safety profile.

While a nose thread lift can be an excellent option for those wary of a surgical rhinoplasty or those who wish to “try out” a new nose shape without permanent commitment, it is essential to remember that the final outcome is not permanent.

If you are considering improving the appearance of your nose but prefer an option less invasive than surgery, a nose thread lift may be the ideal solution. The nose thread lift is only suitable for improving certain aspects of the nose and so we recommend booking a consultation with our doctors to see if it is the right treatment for you.

Hair loss can be a troubling concern for millions of people worldwide. From receding hairlines to thinning patches, hair loss can negatively impact self-confidence and emotional wellbeing. As a result, many individuals turn to treatments with the hopes of restoring their locks to their former fullness. One of the most well-known remedies is minoxidil – …

Hair loss can be a troubling concern for millions of people worldwide. From receding hairlines to thinning patches, hair loss can negatively impact self-confidence and emotional wellbeing. As a result, many individuals turn to treatments with the hopes of restoring their locks to their former fullness. One of the most well-known remedies is minoxidil – a topical medication commonly available over the counter in a variety of strengths. But does it really regrow hair, and how effective can it be in the long run? We will explore the ins and outs of minoxidil, including how it works, its effectiveness, potential side effects, and how it can be combined with other treatments like PRP (Platelet-Rich Plasma) scalp therapy.

Understanding Hair Loss

Before delving into minoxidil’s role in promoting hair regrowth, it is crucial to understand the basics of hair loss. Hair grows in cycles, with each hair progressing through phases of growth (anagen), transition (catagen), and rest (telogen). Eventually, the hair is shed, and a new cycle begins. Normally, these cycles are balanced, resulting in a stable amount of hair on the scalp.

However, a variety of factors can disrupt this balance, leading to excessive shedding, thinning, or receding hairlines. Some common causes of hair loss include:

  1. Genetics (androgenetic alopecia): Often referred to as male-pattern or female-pattern baldness, androgenetic alopecia is the most common cause of hair loss. It typically presents as a receding hairline in men and diffuse thinning in women.
  2. Hormonal imbalances: Conditions like polycystic ovary syndrome (PCOS), thyroid disorders, or major changes in hormone levels can trigger hair loss. Find out if low testosterone causes hair loss in our blog.
  3. Nutritional deficiencies: Lack of essential vitamins, minerals, or protein can weaken hair and impair growth.
  4. Stress and lifestyle factors: Emotional stress, chronic illness, or certain medications can lead to hair shedding.
  5. Autoimmune disorders: Some autoimmune conditions like alopecia areata can cause patchy hair loss.

Understanding your unique cause of hair loss will help guide you to the most effective treatment. Consulting a hair loss doctor in Manchester or trichologist is an essential first step. Once the cause is identified, targeted interventions can be explored.

A Brief History of Minoxidil

Minoxidil was originally developed as an oral medication for high blood pressure in the late 20th century. Doctors and patients noticed an unusual side effect: excessive hair growth, particularly on the face and body. This hair growth side effect led scientists to investigate the compound’s potential use as a topical treatment for hair loss.

In the decades since, minoxidil (available under brand names such as Regaine in the UK and Rogaine in other parts of the world, alongside generics) has become one of the most popular treatments for androgenetic alopecia. It is available in different strengths, typically 2% and 5% solutions or foams. While minoxidil was once only available by prescription, it is now widely available over the counter in many countries, reflecting its relative safety and established efficacy.

How Does Minoxidil Work?

The exact mechanism of action by which minoxidil promotes hair growth is still not fully understood. However, several theories have been proposed, including:

  1. Vasodilation: Minoxidil is a vasodilator, which means it helps widen blood vessels and improve blood flow. When applied topically to the scalp, minoxidil may increase blood supply to the hair follicles. This enhanced blood flow could deliver more oxygen and nutrients, potentially stimulating follicular activity and hair growth.
  2. Prolongation of the Anagen Phase: Scientific research suggests minoxidil can extend the anagen (growth) phase of hair follicles, thereby allowing hair to grow for a longer period before entering the resting phase. This extended growth window might result in thicker, fuller hair.
  3. Stimulation of Follicle Size: Minoxidil may also increase follicle size, allowing hair to grow thicker and more robust.

While these mechanisms are still not entirely understood, clinical evidence has repeatedly shown that minoxidil can reduce or slow hair loss and, in many cases, encourage regrowth. It is particularly useful in individuals with early to moderate thinning rather than those with advanced hair loss.

Minoxidil’s Effectiveness: What the Studies Say

Multiple studies over the years have evaluated minoxidil’s efficacy in men and women. Some key findings include:

  1. Male-Pattern Baldness: Numerous clinical trials have demonstrated that minoxidil significantly improves hair count and thickness in men with androgenetic alopecia. In many of these trials, men with mild to moderate hair loss are more likely to see beneficial results compared to those in advanced stages.
  2. Female-Pattern Hair Loss: Studies also show that minoxidil is effective for women, especially those experiencing diffuse thinning on the top of the scalp. Women often see improvements in both hair density and scalp coverage.
  3. Long-Term Use: Because androgenetic alopecia is a chronic condition, any benefits achieved with minoxidil tend to be lost once the product is discontinued. Long-term, consistent use is often necessary to maintain results.

While minoxidil does not guarantee regrowth for everyone, a significant portion of people who use it experience slower hair loss and noticeable regrowth. Of those who do see regrowth, improvements commonly become visible at around three to six months of consistent use, with continued gains up to a year.

Applying Minoxidil: Best Practices

To maximise results and minimise side effects, proper application of minoxidil is essential. Below are some practical tips:

  1. Choose the Right Strength: Minoxidil is most commonly available in 2% or 5% solutions or foams. The 5% solution is generally more potent and may offer better results but can also lead to slightly higher rates of side effects. Always follow the instructions or consult with a medical professional for guidance on the ideal strength.
  2. Apply Twice Daily: The recommended frequency for most formulations is twice per day. If this becomes difficult due to lifestyle factors, once-daily application may still offer some benefit, though results can be less pronounced.
  3. Clean, Dry Scalp: Ensure that your scalp is clean and dry before application. This helps the medication absorb more effectively.
  4. Direct Scalp Contact: Part the hair to expose the scalp and apply the solution or foam directly onto the skin. Gently massage it in with your fingers, taking care to avoid excessive contact with the face or neck, as this can lead to unwanted hair growth in those areas.
  5. Patience is Key: Results take time. While some users see improvements in as little as two to three months, it often requires six months or longer to witness visible changes. Consistency and patience are vital.
  6. Ongoing Maintenance: If minoxidil is discontinued, any hair that has regrown or been preserved will gradually be lost. Therefore, continued use is essential for maintaining results.

Potential Side Effects of Minoxidil

Like all medications, minoxidil comes with potential side effects, although many are mild and tolerable for most users. Some common side effects include:

  1. Scalp Irritation: The most frequently reported side effect is scalp redness, dryness, itching, or flaking. This can sometimes be alleviated by switching to a foam formulation or using a moisturising shampoo and conditioner.
  2. Unwanted Hair Growth: Minoxidil can encourage hair growth on other areas of the body if it accidentally comes into contact with them. Being cautious about drips or residue on the face and neck can help prevent this.
  3. Initial Shedding: Some individuals experience increased hair shedding in the first few weeks of use, which can be distressing but is typically a temporary sign that the older hairs are shedding to make way for new, healthier growth.
  4. Rare Systemic Effects: Very rarely, minoxidil can cause systemic side effects such as heart palpitations or dizziness. Discontinue use if you experience any concerning symptoms and consult a medical professional.

While the side effects may sound alarming, most users tolerate minoxidil well. If scalp irritation or other issues persist, consult a doctor or pharmacist for tailored advice or an alternative medication.

Combining Minoxidil with PRP (Platelet-Rich Plasma) Scalp Therapy

Minoxidil is often used in conjunction with other hair restoration techniques to enhance overall results. One increasingly popular option is PRP scalp therapy. PRP involves drawing a small volume of your blood, processing it to separate and concentrate platelets, then injecting this platelet-rich plasma into targeted areas of the scalp.

  • How PRP Works: Platelets contain growth factors that can stimulate cell repair and regeneration. When injected into the scalp, these growth factors may promote healthier hair follicles and potentially increase the efficacy of treatments like minoxidil.
  • Synergistic Benefits: Combining PRP with minoxidil could enhance blood supply to the follicles and further stimulate growth. Many patients find that PRP helps accelerate and augment the hair restoration process started by minoxidil.
  • Safety and Efficacy: PRP is generally considered safe, given that it uses the patient’s own blood, lowering the risk of allergic reactions. Multiple treatments spaced a few weeks apart are typically recommended, with follow-up sessions to maintain improvements.
  • PRP for Mild to Moderate Hair Loss: Like minoxidil, PRP for hair loss tends to be most effective in individuals with mild to moderate hair loss, where the follicles are still active. If the scalp areas are largely devoid of hair and follicles have become dormant, surgical procedures may be more appropriate.

While more clinical studies are underway, many hair restoration clinics and healthcare providers offer PRP as a complementary treatment to minoxidil. If you’re curious about whether PRP scalp therapy could be a good fit for you, consult a specialist who can evaluate your hair loss pattern and recommend a holistic treatment plan.

Other Treatments for Hair Loss

Beyond minoxidil and PRP scalp therapy, there are several other options for hair restoration. Depending on the individual’s specific needs, combining multiple approaches might yield the best outcome:

  1. Finasteride (Propecia): A prescription-only oral medication that works by inhibiting the conversion of testosterone to dihydrotestosterone (DHT). High levels of DHT can shrink hair follicles, leading to hair loss. Finasteride is specifically for men and should not be used by women, especially those who are pregnant or planning to conceive.
  2. Low-Level Laser Therapy (LLLT): Devices like laser caps and combs use low-level light to stimulate hair growth. While evidence is somewhat mixed, some users report improvements in hair density over time.
  3. Nutritional Supplements: A balanced diet rich in vitamins (particularly vitamins A, C, D, E), minerals (such as zinc and iron), and protein is essential for healthy hair. Supplements specifically formulated for hair health can be considered if nutritional deficiencies are suspected.
  4. Hair Transplant Surgery: For those with more advanced hair loss, surgical hair transplantation using follicular unit transplantation (FUT) or follicular unit extraction (FUE) can offer a permanent solution. Minoxidil can be used post-surgery to support graft survival and further enhance results.
  5. Lifestyle Changes: Stress management, regular exercise, and good hair care practices (e.g., avoiding excessive heat styling) can help create an environment for healthier hair growth.

Who is a Good Candidate for Minoxidil?

While minoxidil has a good safety profile and is widely available, it may not be the best choice for everyone. Individuals who are more likely to benefit from minoxidil include:

  1. Those with Early to Moderate Hair Loss: Minoxidil tends to be most effective for individuals who still have functioning hair follicles, even if they are miniaturised. Advanced hair loss or complete baldness typically requires more intensive interventions, such as hair transplantation.
  2. Men and Women with Androgenetic Alopecia: Minoxidil is specifically indicated for androgenetic alopecia. People with other causes of hair loss, such as alopecia areata, may still see benefits, but results can be less predictable.
  3. Committed Users: Because minoxidil requires consistent, long-term use to maintain results, people who can incorporate daily applications into their routine are more likely to see sustained improvement.
  4. Those Seeking Non-Surgical Treatments: Minoxidil is a non-invasive, relatively affordable option compared to surgical hair restoration procedures.

If you’re unsure about whether minoxidil is appropriate for you, consult with our hair loss specialist doctors at CLNQ. They can evaluate your specific pattern of hair loss, discuss any relevant medical history, and recommend a treatment plan tailored to your needs. We offer a wide range of hair loss treatments in Manchester.

Practical Tips for Maximising Hair Growth

While minoxidil and PRP scalp therapy can help boost hair growth, there are several lifestyle habits and supportive measures that can complement these treatments:

  1. Nutrient-Rich Diet: Ensure your daily intake includes plenty of fruits, vegetables, lean proteins, and whole grains. Nutrients like iron, zinc, and biotin are particularly important for maintaining healthy hair.
  2. Manage Stress: Chronic stress can exacerbate hair loss. Techniques such as mindfulness meditation, regular exercise, or therapy can help reduce stress levels and promote overall well-being.
  3. Gentle Hair Care: Avoid harsh chemical treatments, such as repeated bleaching or perms. Use mild shampoos and conditioners, and minimise heat styling to reduce damage.
  4. Scalp Massage: Incorporating scalp massage can boost circulation to hair follicles. Gentle circular motions with your fingertips can be done daily, ideally when applying topical treatments like minoxidil.
  5. Stay Hydrated: Adequate water intake supports cell function and overall scalp health.
  6. Limit Smoking and Alcohol: Smoking can constrict blood vessels and reduce blood flow to the scalp, while excessive alcohol intake can lead to nutritional deficiencies.

By combining a healthy lifestyle with targeted treatments such as minoxidil or PRP scalp therapy, many individuals achieve better and more long-lasting results.

Does Minoxidil Really Regrow Hair?

The short answer is yes, minoxidil can genuinely help regrow hair for a considerable number of people dealing with androgenetic alopecia and certain other forms of hair loss. However, it’s important to keep your expectations realistic and understand that results vary from person to person. While some individuals may experience significant regrowth, others might see only subtle improvements or a slowing of hair loss progression.

  • Consistency: Long-term use of minoxidil is vital for maintaining gains.
  • Combination Therapy: Incorporating other treatments, such as PRP scalp therapy, finasteride (for men), or laser therapy, can amplify results.
  • Personalised Approach: Consulting with a specialist who can customise a treatment plan that suits your unique hair loss pattern, lifestyle, and goals is key.
  • Lifestyle Factors: Don’t underestimate the impact of good nutrition, stress management, and scalp care.

Minoxidil is one pillar in the ever-expanding field of hair restoration, and for many, it can be a valuable, cost-effective, and accessible tool. If you’re considering giving minoxidil a try, speak with our doctors to ensure it’s suitable for your situation. Book your consultation for hair loss in Manchester at CLNQ now.

Acne can leave lasting reminders long after the active phase of spots and inflammation has subsided. Many individuals who have experienced moderate to severe acne end up with varying degrees of scarring, which can affect their self-esteem and confidence. While there are numerous treatments to tackle acne scars—from chemical peels and laser therapy to dermabrasion—one …

Acne can leave lasting reminders long after the active phase of spots and inflammation has subsided. Many individuals who have experienced moderate to severe acne end up with varying degrees of scarring, which can affect their self-esteem and confidence. While there are numerous treatments to tackle acne scars—from chemical peels and laser therapy to dermabrasion—one method stands out for specifically targeting deep, pitted scars: acne punch excision.

Understanding Acne Scarring

It is helpful to understand how acne scars develop in the first place. Acne scars are typically caused by the inflammation and trauma that occur during active acne. When spots, pimples, or cysts form, they can lead to tissue damage within the deeper layers of the skin. The body’s natural healing process tries to repair this damage by producing collagen. If the body produces too much or too little collagen, the resulting scar may appear raised or depressed.

Types of Acne Scars

• Ice Pick Scars: These are narrow, deep scars that extend into the dermis. They often look as though a sharp object has ‘punctured’ the skin, hence the name.

• Boxcar Scars: These are wider depressions with more defined edges. They can appear round or oval and resemble the marks left by conditions such as chickenpox.

• Rolling Scars: These scars create undulating or wave-like depressions across the skin’s surface, caused by fibrous bands of tissue pulling the skin inward.

• Hypertrophic/Keloid Scars: These are raised, thick scars that result from excessive collagen production during healing.

While certain scars can be effectively treated using surface-level interventions like microdermabrasion or superficial chemical peels, deeper scars—especially ice pick and certain boxcar scars—often respond better to more targeted interventions, such as punch excision.

What Is Acne Punch Excision?

Acne punch excision is a minor surgical procedure designed primarily to address deep, pitted acne scars, commonly referred to as ice pick or narrow boxcar scars. The concept behind this method is relatively straightforward: a specialised tool, known as a punch biopsy instrument, is used to remove the scarred area of the skin. The resulting wound is then sutured or closed, enabling the skin to heal in a more uniform manner.

In some cases, once the scar is removed, the small opening can either be closed directly or replaced with a tiny skin graft (taken from a less visible area of the body), depending on the surgeon’s assessment and the size of the defect. Punch excision can be a highly effective solution because it directly targets the area of scar tissue, removing it entirely rather than just masking or smoothing its appearance.

Who Is a Suitable Candidate for Acne Punch Excision?

Although punch excision can achieve excellent results for certain individuals, it is not suitable for all types of scars or for every patient. Below are a few factors that make someone a potentially good candidate:

1. Type of Scar: Ideal for deep, narrow scars such as ice pick or some boxcar scars. Shallower scars may respond better to resurfacing techniques, and rolling scars often improve with subcision or other methods.

2. Stable Skin Condition: The individual should not have active acne or severe skin inflammation. Punch excision is most beneficial once acne is largely under control.

3. Non-Smoker or Willing to Quit Temporarily: Smoking can impair wound healing and affect the overall results.

4. Realistic Expectations: While results can be dramatic, it is important to remember that no scar removal technique can guarantee the absolute elimination of all blemishes. Improvement in scar appearance is the key goal.

5. Overall Good Health: Being generally healthy can help ensure a smoother healing process and reduce the risk of complications.

If you have a combination of scar types—say rolling scars along with a few ice pick scars—it is common to undergo multiple complementary treatments. Our team at CLNQ can suggest a personalised treatment plan that may include punch excision alongside other procedures like laser resurfacing or subcision.

Benefits of Acne Punch Excision

Punch excision offers several advantages for those struggling with deep acne scars:

1. Targeted Removal of Scar Tissue: By directly removing problematic scar tissue, this procedure allows the skin to heal without the tethering or pitting that originally caused the depression.

2. Effectiveness for Ice Pick Scars: Among all the methods available, punch excision is particularly successful in dealing with ice pick scars—those narrow, deep depressions that many other treatments find difficult to address.

3. Minimal Downtime: While there is some healing involved, the downtime is usually less than that associated with more extensive procedures, such as deep chemical peels or ablative laser resurfacing. There may be stitches that require removal after 7-10 days.

4. Potential for Dramatic Improvement: Even though some minor scarring may remain, punch excision has the potential to significantly enhance the skin’s smoothness and overall appearance.

5. Combination-Friendly: Punch excision can easily be combined with other scar revision techniques for a more comprehensive approach to acne scarring.

What to Expect During the Procedure

Anaesthesia

On the day of the procedure, the treatment area will be thoroughly cleansed. A local anaesthetic is injected into the area around the scar. This numbs the region, ensuring you remain comfortable throughout the procedure.

Punch Excision

A small, cylindrical punch biopsy tool—sized to match the width of your scar—is used to cut around and beneath the scar. The goal is to completely remove the tissue that forms the depressed or ice pick scar. Depending on the scar’s depth and diameter, the punch size usually ranges from 1mm to 3mm in diameter.

Closure or Grafting

After the scar is excised, there will be a tiny hole or wound. There are two main options for closure:

1. Primary Closure: The edges of the wound are sutured together. This is usually sufficient for smaller defects and ensures a linear scar that often heals more discreetly than the original scar.

2. Skin Graft (Punch Grafting): For larger or deeper scars, we may fill the excised area with a small skin graft taken from a discreet site—often behind the ear. This technique is particularly useful if primary closure might result in tension or distortion of the surrounding skin.

Dressing and Post-Procedure

Once the excision and closure are complete, a sterile dressing or bandage is applied to protect the area. We will provide instructions on caring for the wound and may book a follow-up appointment to remove sutures and assess the healing.

Recovery and Aftercare

Initial Days After Surgery

• Mild Swelling and Redness: Some swelling, bruising, or redness around the treated site is normal. This usually subsides within a few days.

• Stitch Care: You will have a dressing covering the stitches which will be removed typically 7–10 days post-procedure.

• Pain Management: Over-the-counter painkillers like paracetamol may be recommended if you experience discomfort. Avoid medications that can thin the blood, like ibuprofen or aspirin.

Long-Term Aftercare

• Avoid Picking or Scratching: Refrain from picking at scabs or scratching the treatment site, as this can prolong healing and increase the risk of infection.

• Sun Protection: Use a broad-spectrum sunscreen (SPF 30 or higher) and limit direct sun exposure to prevent hyperpigmentation of the healing scars.

• Follow-Up Treatments: Depending on how well your skin heals, you might benefit from complementary therapies such as laser resurfacing, micro-needling, or chemical peels to refine skin texture and improve the surrounding areas.

The total recovery time for punch excision is usually a few weeks, although complete healing and final results can take a few months. This timeline may extend if additional treatments, such as skin grafting or further scar revisions, are performed.

Risks and Potential Complications

As with any invasive procedure, acne punch excision carries some risks. While complications are rare when performed by an experienced doctor, it is still important to be aware of the following:

1. Infection: If the treatment area is not kept clean, bacteria can enter the wound, leading to infection. Signs include persistent redness, swelling, and discharge.

2. Scarring: There will be a permanent scar at the site of the excision. Rarely, this could be more noticeable than desired. However, this risk is generally mitigated by careful suturing and adequate aftercare. You can use silicone scar products after suture removal to aid the healing.

3. Changes in Skin Pigmentation: Some individuals may experience temporary or, rarely, permanent hyperpigmentation (darkening) or hypopigmentation (lightening) at the treatment site.

4. Allergic Reaction: Though uncommon, patients can sometimes react to the local anaesthetic or other materials used during the procedure.

5. Wound Healing Issues: Smoking, certain health conditions (like diabetes), or inadequate aftercare can slow healing and lead to complications.

Comparisons with Other Acne Scar Treatments

While acne punch excision is ideal for specific types of scars, other treatments may also be considered based on the patient’s overall skin condition and scar characteristics. Here is a brief comparison:

Punch Excision vs. Subcision

• Subcision is a technique used mainly for rolling scars. A needle is inserted beneath the scar to release the fibrous bands pulling the skin down, allowing it to rise to the surface. Punch excision, by contrast, directly removes the scar tissue, making it more suitable for ice pick or narrower boxcar scars.

Punch Excision vs. Laser Therapy

• Laser Treatments (such as fractional laser resurfacing) help resurface the skin and stimulate collagen production. They are often used for superficial to moderate scars. Deep ice pick scars may need more direct intervention, like punch excision, for optimal improvement.

Punch Excision vs. Chemical Peels

• Chemical Peels can help with surface-level improvements, pigmentation issues, and mild scarring. Deep or stubborn scars (like ice pick) often require more targeted surgical methods. Punch excision can sometimes be followed by a chemical peel once the skin has healed for additional refinement.

Punch Excision vs. Dermal Fillers

• Dermal Fillers can be used to plump depressions in the skin. While they can provide immediate improvement, the results are typically temporary, and fillers do not remove scar tissue. Punch excision removes the scar entirely, which can lead to a more permanent outcome.

Our team at CLNQ may recommend a combination approach—such as using punch excision to remove the most severe scars, followed by laser resurfacing or subcision to address the more superficial scars—for a comprehensive improvement in skin texture.

Results and Longevity

Most individuals notice a visible improvement in the appearance of their acne scars once the treated areas have fully healed. The final results can take a few months to become apparent, as the body continues to remodel collagen and the residual redness fades. Over time, the incisions and graft sites typically soften and blend with the surrounding skin.

As punch excision physically removes scar tissue, the results are generally permanent. However, the skin continues to age, and new issues such as wrinkles or pigmentation changes can appear over time. Additionally, if you experience a new bout of severe acne, you could develop fresh scarring in untreated areas.

Frequently Asked Questions

Does acne punch excision hurt?

Most people experience only mild discomfort during the procedure due to local anaesthesia. You may feel a slight pressure or tugging sensation, but you should not feel pain. After the anaesthetic wears off, you might notice some tenderness, which can typically be managed with over-the-counter pain relievers.

How long does each treatment take?

The procedure itself is relatively quick. Depending on how many scars are being treated, punch excision can take anywhere from 15 to 30 minutes.

When can I wear make-up again?

It is generally advised to avoid applying cosmetics to the treated area until the initial healing is well underway—usually around one to two weeks. Once the stitches have been removed and wound closed then you can apply make up.

Will I need time off work or daily activities?

Most patients can resume regular day-to-day tasks almost immediately after treatment, but you should avoid strenuous exercise or heavy lifting for a few days. You will have a small dressing covering the area after the procedure.

Can punch excision be combined with other scar treatments?

Yes, it is common to pair punch excision with other treatments like laser resurfacing, subcision, or micro-needling to address different scar types. This multi-modal approach often yields the best overall outcome.

How do I reduce the likelihood of new acne scars forming?

Maintaining a consistent skincare regimen, avoiding picking or squeezing spots, and using any prescription acne medications recommended by your skin doctor or specialist can help prevent new acne breakouts and subsequent scarring.

What if I have active acne?

Active acne should be brought under control before undergoing punch excision. If you have ongoing breakouts, speak to our skin experts about topical treatments, antibiotics, or hormonal therapies (if relevant) to manage your acne.

Are there any alternatives to punch excision for ice pick scars?

Although ice pick scars can be challenging to treat, some individuals opt for TCA (trichloroacetic acid) peels, dermal fillers, or laser resurfacing. However, for many patients with deep and narrow scars, punch excision remains one of the most definitive treatments.

Conclusion

Acne punch excision is a tried-and-tested technique that directly tackles the most stubborn and deep-seated acne scars, especially the notorious ice pick varieties. By physically removing scar tissue with a specialised punch biopsy tool, this procedure lays the foundation for smoother, healthier-looking skin. While it is not a universal remedy—some patients may benefit more from alternative or additional therapies—punch excision can offer significant and lasting improvement for those who are good candidates.

If you are considering this procedure, ensure you select a qualified and experienced skin doctor or plastic surgeon who will conduct a thorough evaluation of your skin. In many cases, combining punch excision with other treatments, such as laser resurfacing or subcision, can offer a more complete solution to the mosaic of acne scars.

Finally, remember that while scars may be a part of your skin’s history, they do not have to define your present or future. Advancements in cosmetic and dermatological procedures mean that significant improvements are within reach. With realistic expectations and professional guidance, acne punch excision can be an empowering step towards feeling more confident in your own skin.

The Salmon Sperm Facial, a procedure that uses extracts from salmon sperm or milt (the fluid containing sperm cells) to rejuvenate the skin. While the name alone can raise eyebrows, advocates say it may help boost collagen, combat inflammation, and deliver a plumper, more youthful complexion. We explore the key aspects of the Salmon Sperm …

The Salmon Sperm Facial, a procedure that uses extracts from salmon sperm or milt (the fluid containing sperm cells) to rejuvenate the skin. While the name alone can raise eyebrows, advocates say it may help boost collagen, combat inflammation, and deliver a plumper, more youthful complexion. We explore the key aspects of the Salmon Sperm Facial, from its underlying science to benefits, risks, and aftercare.

Understanding the Basics: What Is a Salmon Sperm Facial?

At its core, the Salmon Sperm Facial utilises polynucleotides—long chains of DNA and RNA fragments found in salmon sperm. Proponents argue that these molecules can support the skin’s natural repair mechanisms, potentially enhancing collagen production and reducing mild inflammation. Historically, salmon DNA injections have been investigated for tissue healing, so adapting the concept into a facial was a logical leap for aesthetic clinics seeking novel therapies.

Unlike a typical spa facial that relies on masks or standard skincare products, this procedure incorporates specially formulated salmon sperm extract. Despite its unconventional source, many devotees claim their skin feels firmer, looks brighter, and retains moisture more effectively after treatment.

The Science Behind Salmon Sperm Extract

The principle behind salmon sperm extract rests on the idea that polynucleotides may help promote skin regeneration. When applied or introduced via micro-channels in the skin, they could stimulate fibroblasts—cells responsible for producing collagen and elastin. Increased collagen typically leads to improved firmness and elasticity, which is why so many anti-ageing therapies target its production.

Further, some studies on polynucleotide-based treatments suggest they might calm inflammation, potentially helping individuals with redness or irritation. While the majority of research focuses on injections rather than facials, the underlying mechanism could be similar. By supplying DNA and RNA components, the treatment may provide raw materials that bolster tissue repair. However, it’s crucial to emphasise that controlled clinical trials specifically examining Salmon Sperm Facials remain limited, and more research is needed before drawing definitive conclusions.

How the Procedure Works

A typical Salmon Sperm Facial involves:

• Cleansing and Exfoliation: The skin is thoroughly cleansed to remove impurities, followed by light exfoliation. This step helps clear away dead cells and enhances ingredient absorption.

• Application of Salmon Sperm Extract: A serum containing salmon sperm polynucleotides is then spread over the treatment area.

• Micro-Needling or Mesotherapy (Optional): We can use fine needles or specialised devices such as Morpheus8 to create tiny channels in the skin’s surface. This approach helps deliver active ingredients deeper, where they can potentially exert greater effects.

• Soothing and Hydration: After the extract is applied, a calming mask or moisturiser is often used to seal in the nutrients and minimise post-procedure redness.

The overall session can last from 30 minutes to an hour, depending on add-ons like LED light therapy or gentle chemical peels. Most people can resume normal activities right after, though mild redness might persist for a day or two.

Potential Benefits and Claims

Like many aesthetic treatments, the Salmon Sperm Facial comes with a list of hoped-for outcomes:

• Collagen Boost: By targeting fibroblasts, it may encourage the skin to ramp up collagen production, potentially reducing the appearance of fine lines.

• Hydration and Glow: Some people report a dewy complexion after treatment, thanks to enhanced moisture retention.

• Smoother Texture: Micro-needling and gentle exfoliation can refine skin texture, minimising the visibility of pores or mild scarring.

• Soothing Effects: If the polynucleotides do exert anti-inflammatory properties, they could help calm mild redness or sensitivity.

• Rapid Recovery: Compared to deeper peels or aggressive laser treatments, the Salmon Sperm Facial often involves less downtime, making it an appealing option for those who want immediate results with minimal disruption.

Possible Risks and Side Effects

No treatment is entirely risk-free, and the Salmon Sperm Facial is no exception:

• Allergic Reactions: Although rare, allergies to marine-derived substances are possible. A patch test may be recommended if you have concerns.

• Redness and Irritation: Micro-needling can leave the skin temporarily sensitised. This typically subsides within a day or two but can last longer for those with reactive skin.

• Infection: Any procedure involving needles carries a small risk of infection, emphasising the importance of choosing a reputable, hygienic clinic.

• Lack of Standardised Research: While preliminary findings on polynucleotides are encouraging, large-scale, peer-reviewed studies specifically focused on the Salmon Sperm Facial remain scarce.

• Cost: Since the extract and procedure are specialised, the treatment can be more expensive than traditional facials.

Who Might Benefit from a Salmon Sperm Facial?

People who might consider this treatment include those seeking to address early signs of ageing, minor textural issues, or dullness. If you have sensitive skin conditions like active acne or rosacea, you should consult a dermatologist or skin doctor first. While the facial could potentially soothe mild inflammation, the micro-needling component might aggravate certain skin problems. As with any cosmetic procedure, individual suitability varies greatly, so a professional evaluation is essential.

Salmon Sperm Facial vs. Other Trending Treatments

The aesthetic landscape is full of treatments claiming transformative results. Here’s how the Salmon Sperm Facial compares to some well-known alternatives:

• Vampire Facial (PRP): Uses platelet-rich plasma from your own blood. Although both aim to boost collagen, the biological material differs significantly, which may make one more suitable than the other for specific skin issues.

• Stem Cell Facial: Typically involves plant-based or synthetic stem cells intended to speed skin repair. The underlying principle is akin to the Salmon Sperm Facial in that both employ regenerative substances, but the source material isn’t marine-derived.

• Chemical Peels: Rely on acids to remove damaged outer layers of skin. While this can improve texture and tone, peels lack the potential cellular repair angle of polynucleotide-based therapies.

• Micro-Needling with Other Serums: Similar delivery method but depends on the active ingredients used. Growth factors, hyaluronic acid, and peptides are common, though salmon sperm extract provides a unique twist.

Aftercare and Recovery Tips

To ensure you get the most from your Salmon Sperm Facial, proper aftercare is vital:

• Sun Protection: Post-treatment, the skin may be more sensitive to UV exposure. A high-SPF sunscreen or sun avoidance can help protect against irritation and hyperpigmentation.

• Gentle Skincare Regimen: Avoid harsh exfoliants, retinoids, or intense scrubs for a few days, allowing the skin barrier to recover.

• Hydration: Keeping the skin moisturised can prolong any glow achieved during the facial. Drinking enough water also helps support overall skin health.

• Watch for Reactions: Mild redness is common, but if you notice excessive swelling, prolonged discomfort, or unusual discharge, contact your provider.

• Follow Professional Guidance: If additional sessions are recommended, stick to the advised schedule for best results. Some practitioners may pair polynucleotide therapy with LED treatments or mild chemical peels for enhanced benefits.

Frequently Asked Questions

How soon will I see results?

Many people notice an immediate radiance, though deeper improvements in collagen may take several weeks and multiple sessions.

Is it safe for all skin types?

It’s generally deemed safe for a variety of skin types, but those with severe sensitivities, open wounds, or marine-based allergies should exercise caution.

Can I wear makeup afterward?

We suggest waiting until the next day to ensure the skin has time to recover. Once any redness subsides, makeup can usually be applied as normal.

Are touch-up sessions necessary?

Like most aesthetic treatments, results are not permanent. Periodic sessions may help maintain benefits, especially if you’re looking to address ongoing concerns like wrinkles or dullness.

Does it smell fishy?

Reputable products are refined and typically odourless. The final serum or mask generally lacks a distinct fishy scent.

Conclusion: Is the Salmon Sperm Facial Worth It?

The Salmon Sperm Facial stands out among the latest skincare innovations thanks to its unusual primary ingredient and claims of enhanced collagen production and skin renewal. While some people rave about glowing, smoother skin, the scientific community still awaits larger, more rigorous studies focused specifically on this therapy. If you’re intrigued by pioneering treatments and want to explore options beyond conventional facials, the Salmon Sperm Facial could be a contender—you can book a consultation to see if the facial or injectable polynucleotides are suitable for your needs.

Ultimately, whether this procedure is right for you depends on your skin’s needs, personal comfort levels, and openness to cutting-edge aesthetics. For those ready to take the plunge, choosing a reputable clinic with qualified staff is essential to minimise any risks. While not a miracle cure-all, this facial underscores just how inventive modern cosmetic science can be.

Pages

Confident. Beautiful. Empowered.

The Leading Aesthetic and Longevity Clinic in Manchester and Cheshire

We are dedicated to helping you achieve your health and wellness goals through our comprehensive range of personalized treatments and luxury approach. Whether you’re seeking to address specific concerns, enhance your appearance, or simply optimize your well-being, we have the solution. Our team of experts is passionate about creating a welcoming and supportive environment where you can feel comfortable and confident in your journey to a more radiant you. Don’t wait any longer to start your journey to optimal health and beauty.